Home Assistant WebHook Trigger
Description
The Home Assistant WebHook Trigger (HASS Trigger) tool when executed will trigger a Home Assistant Webhook Trigger. This allows users to trigger Zene workflows from Home Assistant. This feature enables users to integrate Zene with their smart home devices and automate their smart home tasks.
Parent Tools
Setting Up - Home Assistant Webhook Trigger
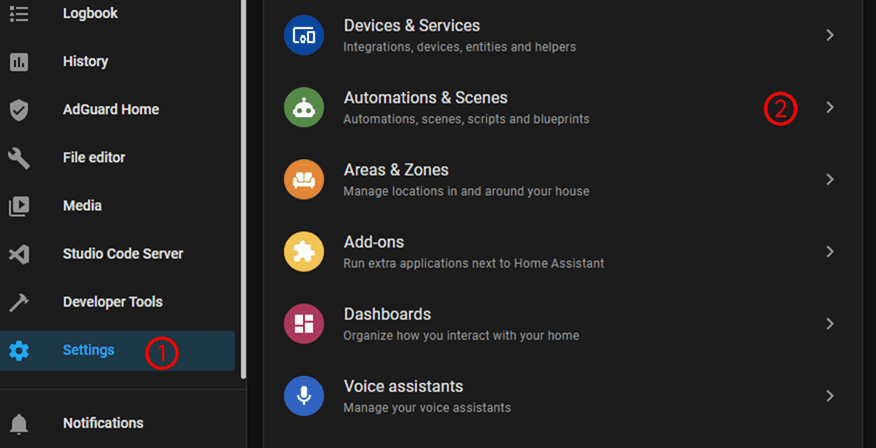
- In Home Assistant, go to
Settings - Click on
Automations & Scenes

- Make sure that the
Automationstab is selected - Click on
+ Create Automation - Select
Create New Automation
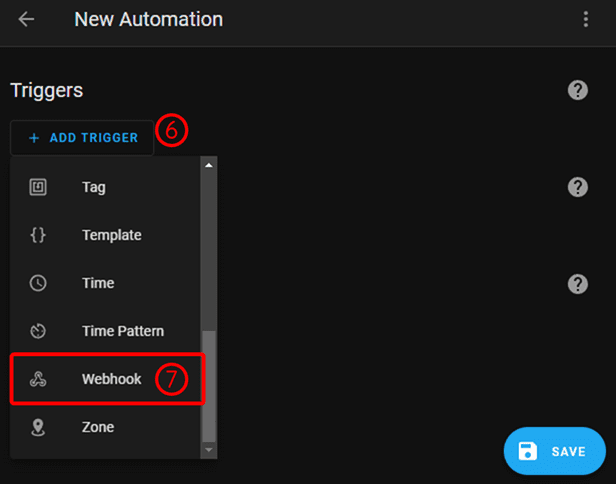
- Click
Add Trigger - Select
Webhook
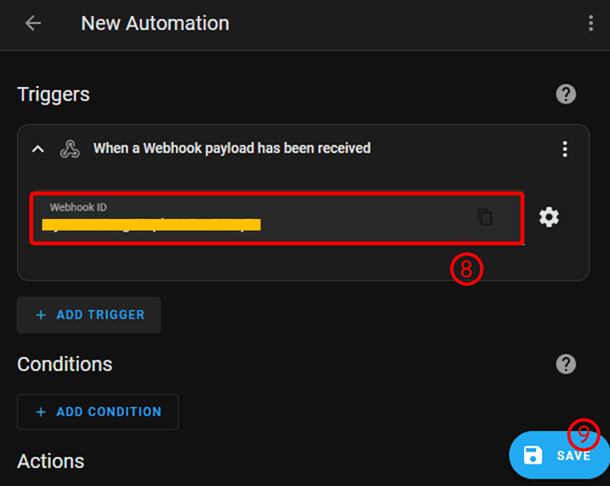
- Copy the
Webhook ID, put this in the Webhook ID field in the HASS Trigger tool setting. - Do not forget to click
Save!
Settings
Setup Tool
Reference to the Home Assistant Config tool.
The Home Assistant Config tool must be configured before using this tool.
Webhook ID
The Webhook ID is the unique identifier of the webhook. It is used to identify the webhook when it is triggered.
See Setting Up - Home Assistant Webhook Trigger for more information on how to get the Webhook ID.
Data type
The type of data to send with the webhook trigger. The following data types are available:
- Query
- JSON
- Form data
Parameters
Query JSONA map of key-value pairs representing the parameters to send with the webhook trigger.
The value input supports Mark-up Text Input.
JSON String
JSONA string representing the JSON-encoded body of the request to send with the webhook trigger.
This input supports Mark-up Text Input.
Form Data
Form dataA map of key-value pairs representing the form data to send with the webhook trigger in a form-encoded format.
The value input supports Mark-up Text Input.