
Part 2 · HTTP Connection · Connecting to an external system
Use HTTP Client, HTTP Request Polling Trigger, and HTTP Client Request to retrieve data from an external server and display it on the Dashboard using a Postman Mock Server.
The previous Flows processed data within NARA. In production, a Flow may also need to communicate with a company API, an ERP system, or a machine server. HTTP is a common protocol for these connections.
In this topic, you will build a Flow that sends HTTP Requests at a configured interval and displays the Response on the Dashboard. The Workshop uses a Postman Mock Server, allowing you to test the complete Flow without depending on a production API.
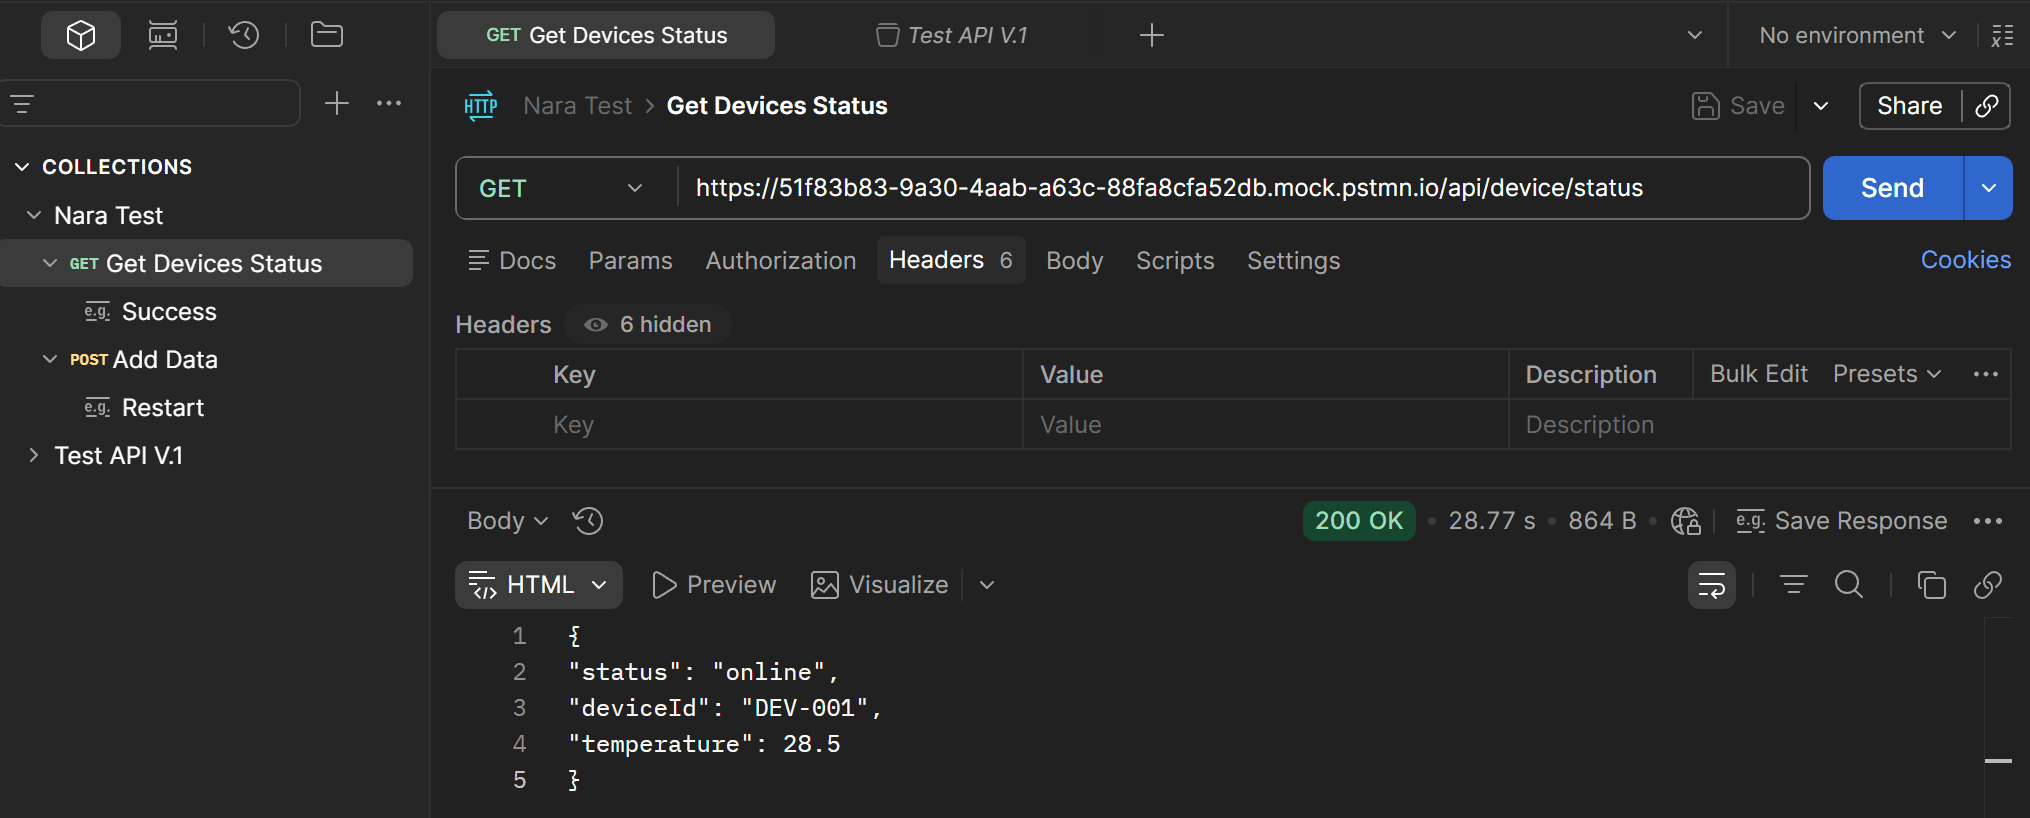
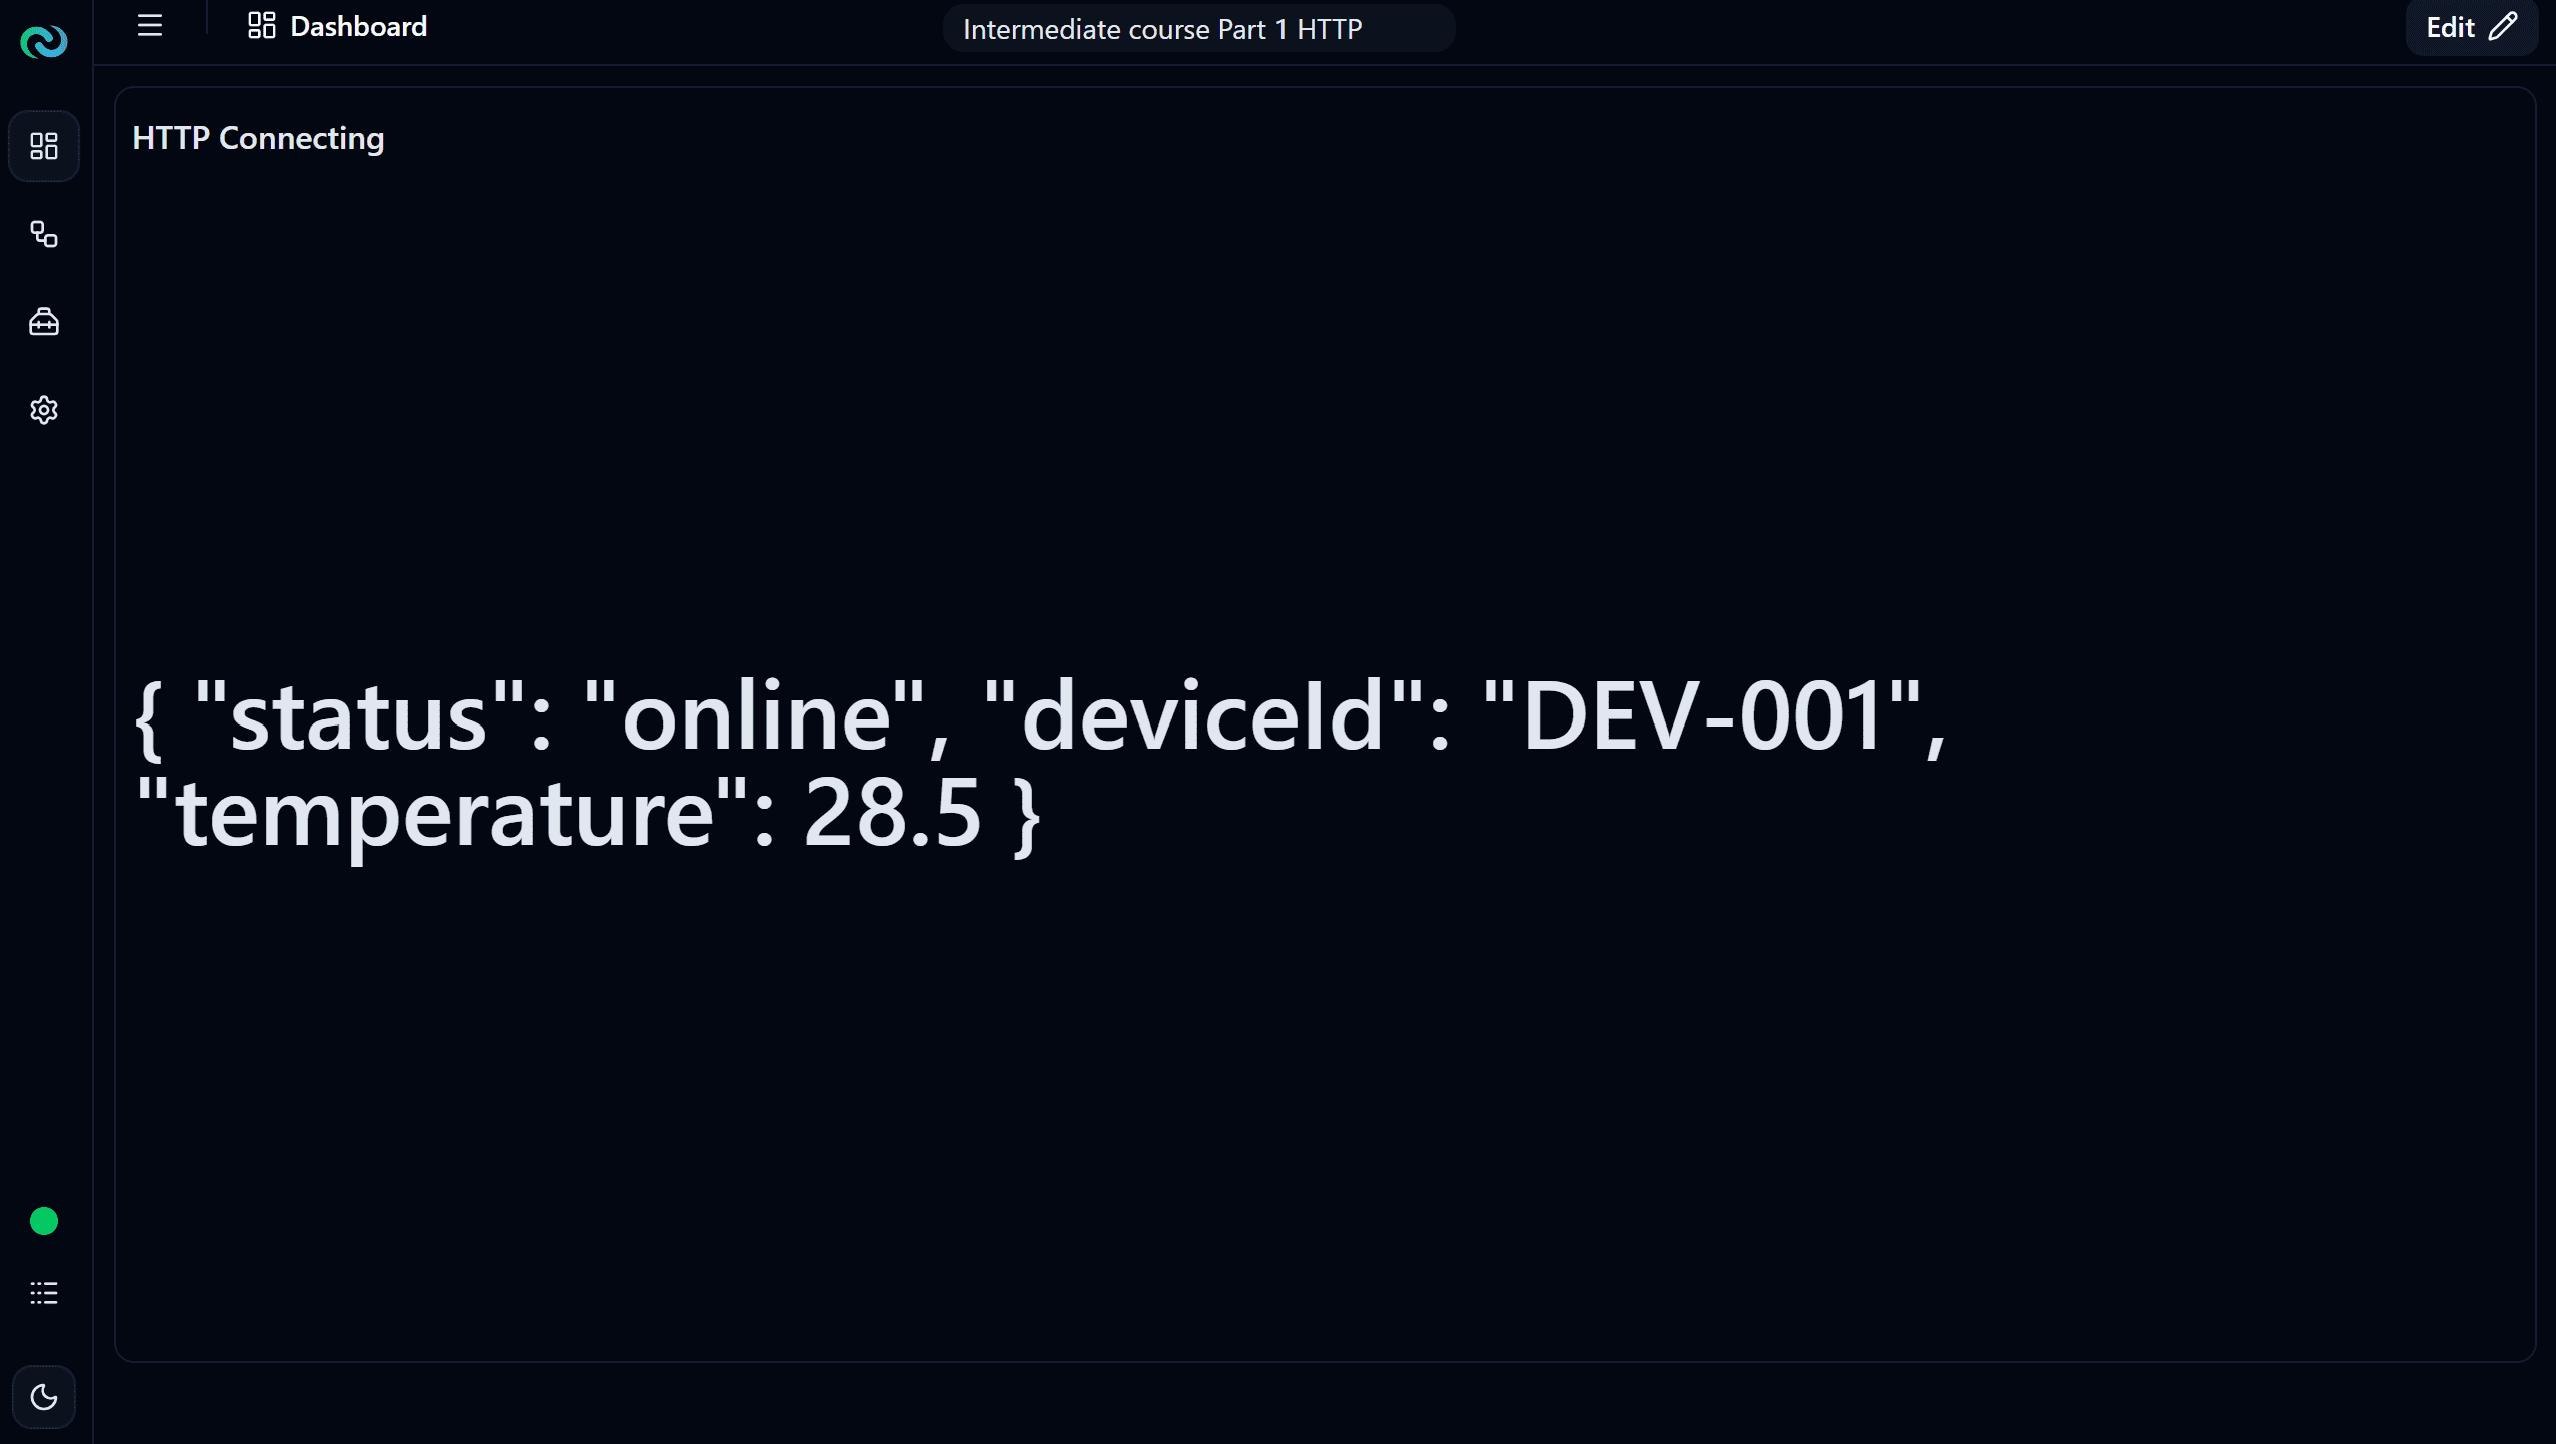
The result is a Dashboard that pulls fresh data every cycle, matching whatever was set up in Postman:
{ "status": "online", "deviceId": "DEV-001", "temperature": 28.5 }1. How Request–Response and Polling work
Core concept of this topic
The heart of HTTP is the Request–Response cycle: we ask, the server answers, and we repeat it over and over with Polling so we always have the latest data.
Request–Response is the fundamental HTTP communication pattern. The Client sends a request out, the Server processes it and returns a response. The Response contains both a status code (e.g. 200 = success) and a body, which is the actual data, usually in JSON form.
Polling is when the Client keeps sending Requests to ask the Server for data repeatedly on a set interval, so that it always has the latest data. For example, setting it to fire every 1 second gives you updated data every second.
A Mock Server is a simulated server we create so that it returns predefined data. When someone sends a Request in, it returns the data set we prepared. It is very useful for testing when the real API is not ready yet, or when you want to verify that the receiving side (NARA) works correctly.
Here, NARA acts as the Client and the Postman Mock Server acts as the Server.
2. NARA's HTTP Nodes
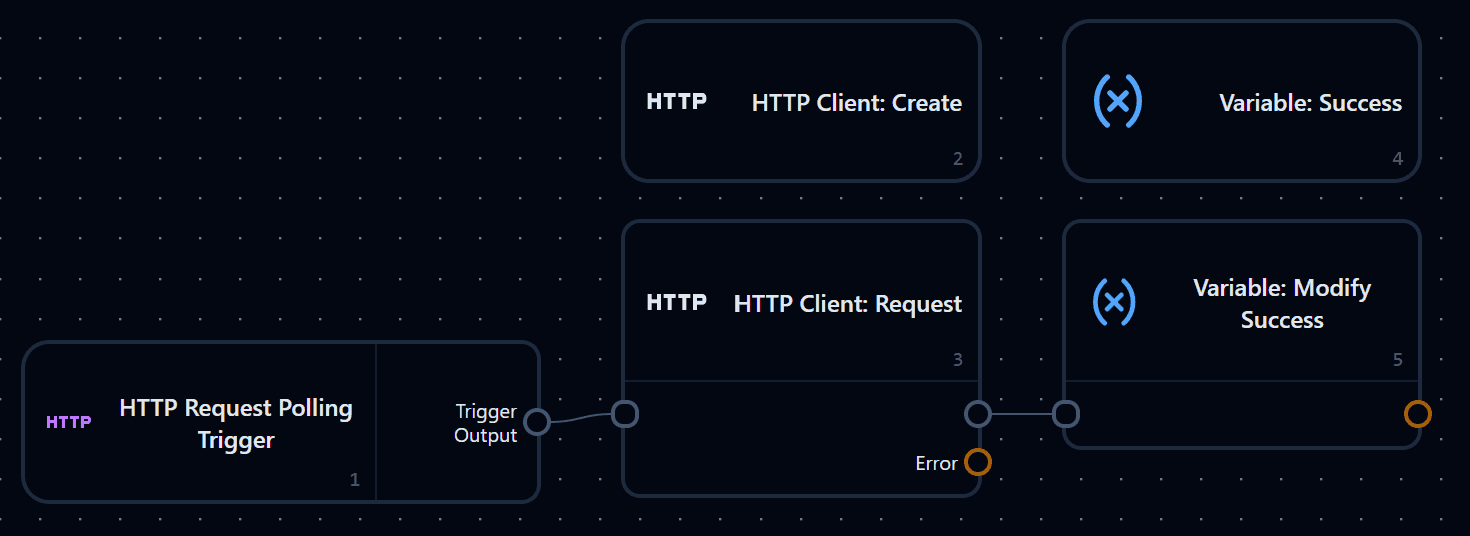
The Nodes come in two groups. The first is the core group for connecting over HTTP:
- HTTP Client: Create, which holds the shared connection settings
- HTTP Request Polling Trigger, which fires Requests repeatedly
- HTTP Client: Request, which sends the actual Request and receives the Response
The second group brings the data onto the Dashboard, and is made of Nodes we've already used: Variable: Create and Variable: Modify.
The Flow runs in this order:
| Order | Node | Purpose |
|---|---|---|
| 1 | HTTP Client: Create | Defines the connection settings (Host, HTTPS, Auth) |
| 2 | HTTP Request Polling Trigger | Sends a GET Request to the server repeatedly on the set Interval |
| 3 | HTTP Client: Request | Sends the HTTP Request and receives the Response body |
| 4 | Variable: Create | Creates the variable that holds the received data |
| 5 | Variable: Modify | Updates that variable with responseBodyText on every Polling cycle |
3. Workshop · Setting up the Postman Mock Server
Postman required
This topic needs Postman installed. If you don't have it, download it at postman.com/downloads. Some familiarity with HTTP methods (GET, POST) and the JSON format helps too.
Start by creating a Mock Server. Once created, Postman gives you a link that looks like this:
https://51f83b83-9a30-4aab-a63c-88fa8cfa52db.mock.pstmn.ioThis link is very important, because we will use it as the endpoint NARA sends Requests to.
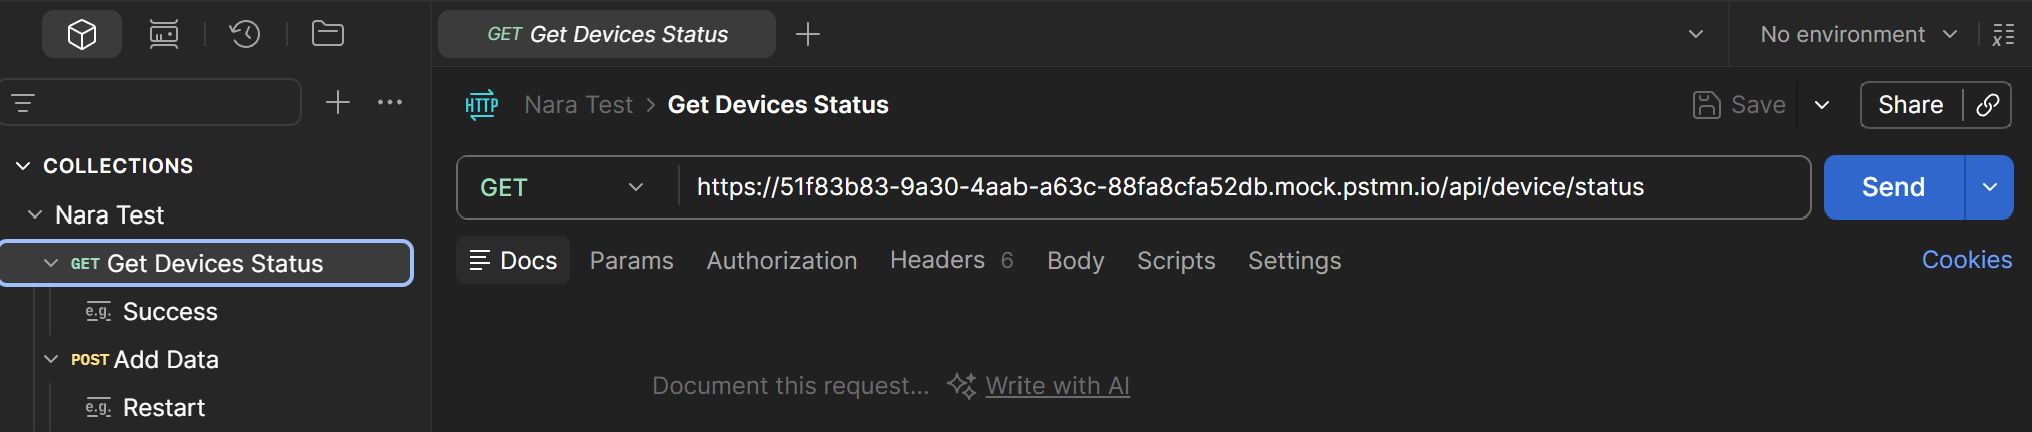
Next, set the Request Method to GET and click Save first. Then go to Add Example to define what it should return when someone calls it.
- Name the Example
Success - In the Response field below, enter the data you want it to return in JSON format:
{
"status": "online",
"deviceId": "DEV-001",
"temperature": 28.5
}- Set the Status code to
200(meaning success) - Click Save, then click Try to test it
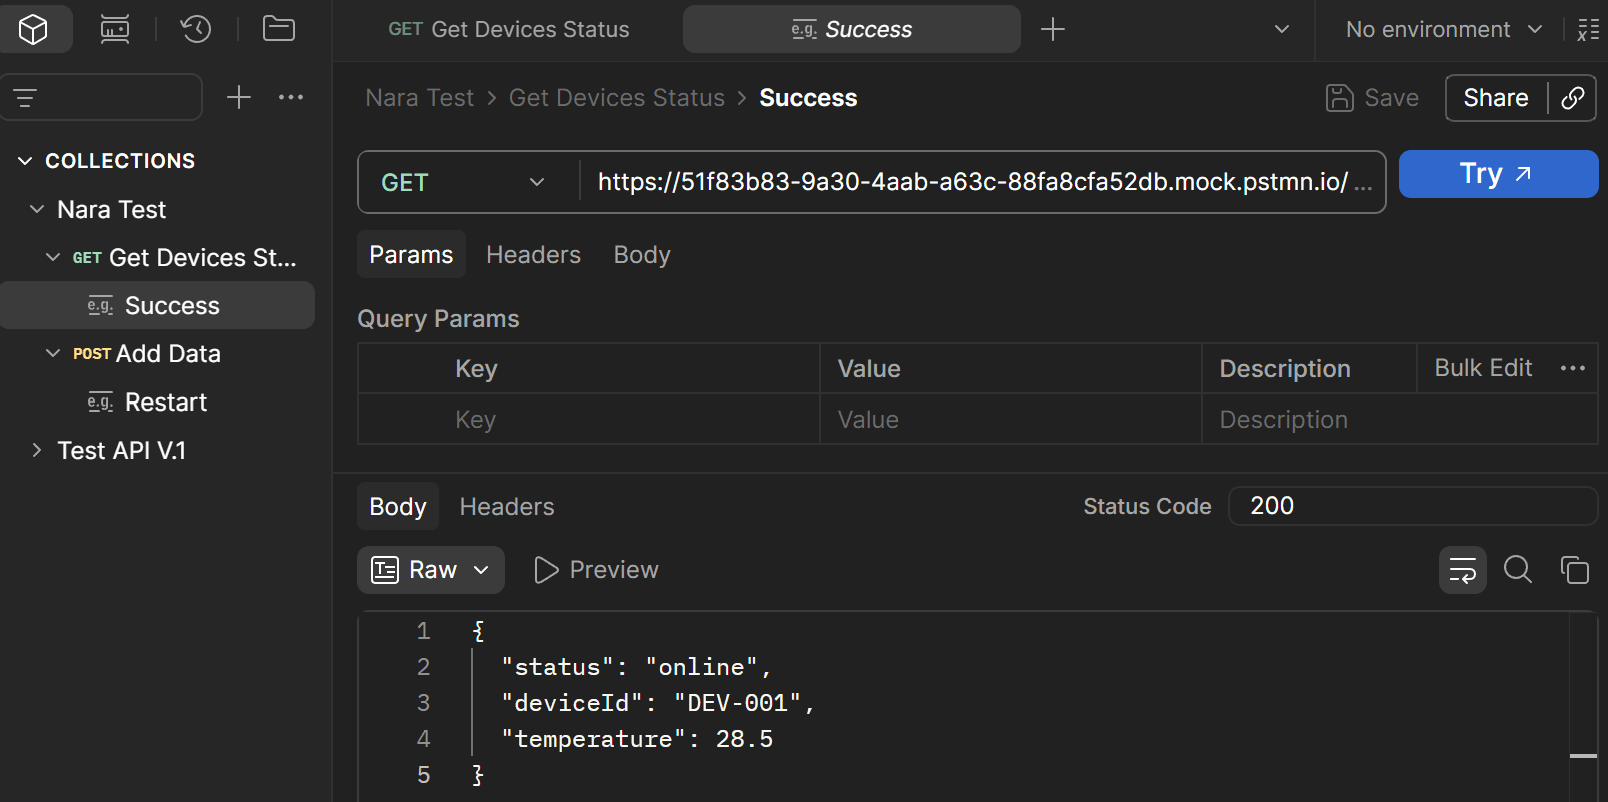
If configured correctly, you will get a 200 OK status along with the JSON data you entered returned back. That means the Mock Server is ready to use.
4. Workshop · Configuring the Nodes on NARA
With the Postman side ready, let's build the NARA side, configuring each Node as follows.
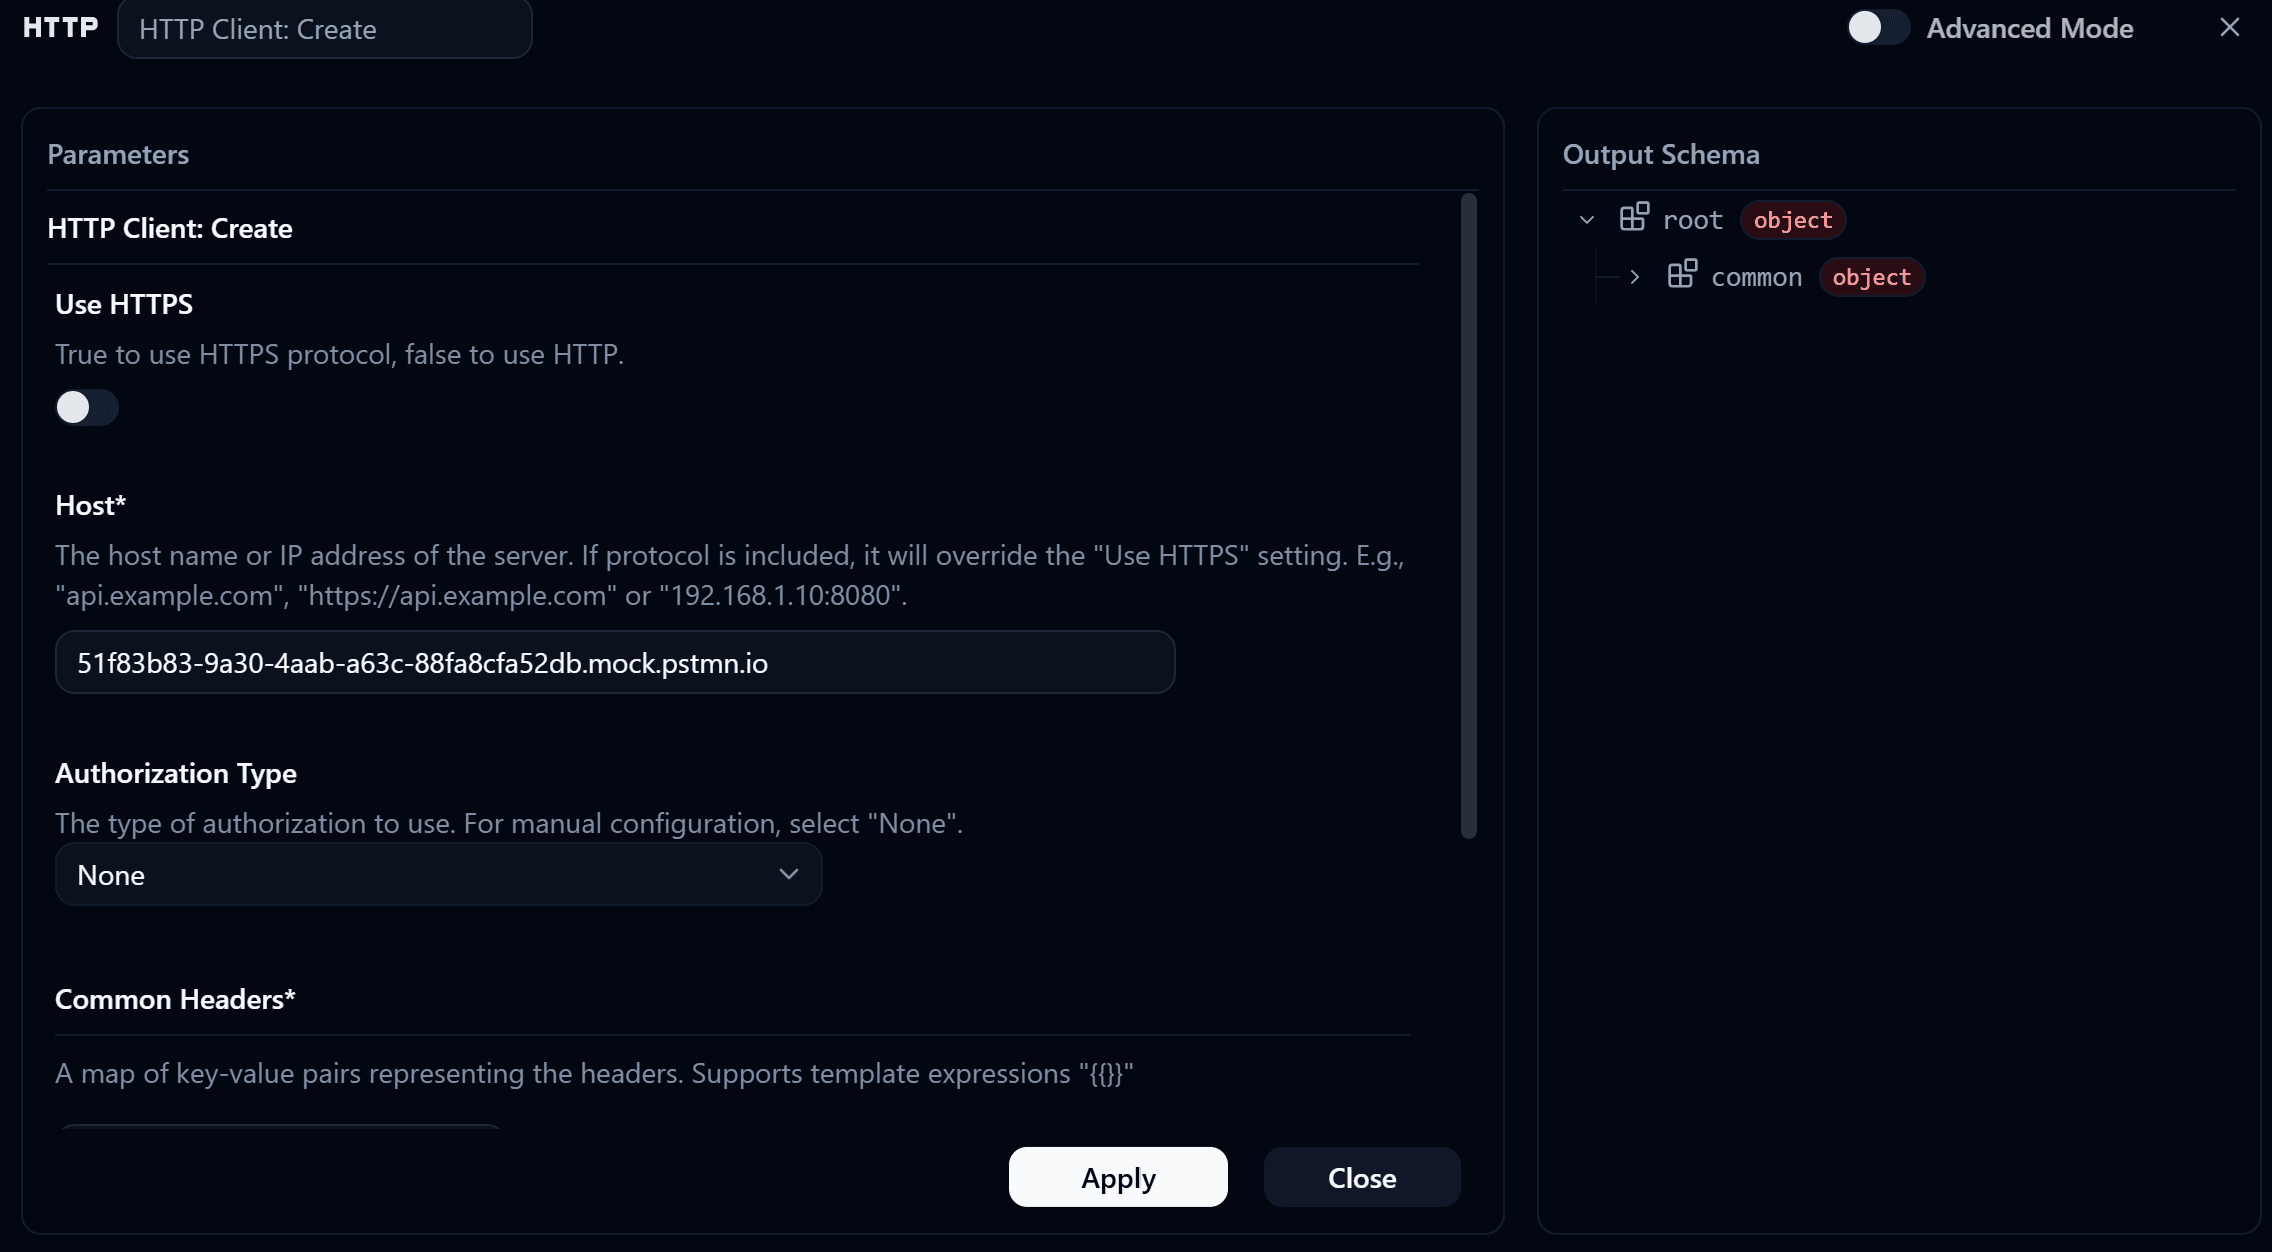
Node 1 · HTTP Client: Create
This is the starting Node that defines the HTTP connection settings. Other Nodes that need to send Requests reference the values from this Node.
| Parameter | Value | Description |
|---|---|---|
| Use HTTPS | OFF | This exercise uses plain HTTP only, not HTTPS yet |
| Host | 51f83b83-9a30-4aab-a63c-88fa8cfa52db.mock.pstmn.io | The server's domain name, bare domain only |
| Authorization Type | None | No authentication needed since it's a general Mock Server |
| Common Headers | empty | Add Headers shared across all Requests here |
| Client Framework | Fallback Only | Use Fallback for compatibility with servers sensitive to headers |
Note
· In the Host field, enter only the bare domain name, e.g. api.example.com, and do not add https:// in front, because HTTPS is toggled on/off in the Use HTTPS field instead.
· This Node's Output Schema only has root > common (object); it has no response data directly.
Node 2 · HTTP Request Polling Trigger
This is a Trigger Node that keeps firing Requests to the endpoint on a set interval (Polling Interval). When it gets a Response back, it passes control to the next Node.
| Parameter | Value | Description |
|---|---|---|
| Setup Tool | HTTP Client: Create 1 | References the Node where the Host was configured |
| Method | GET | The method for retrieving data |
| Path | /api/devices/status | The endpoint path on the server |
| Params | empty | Query parameters (if any) |
| Body type | None | A GET Request has no body |
| Polling Interval (ms) | as desired | How often to fire, e.g. 1000 = every 1 second |
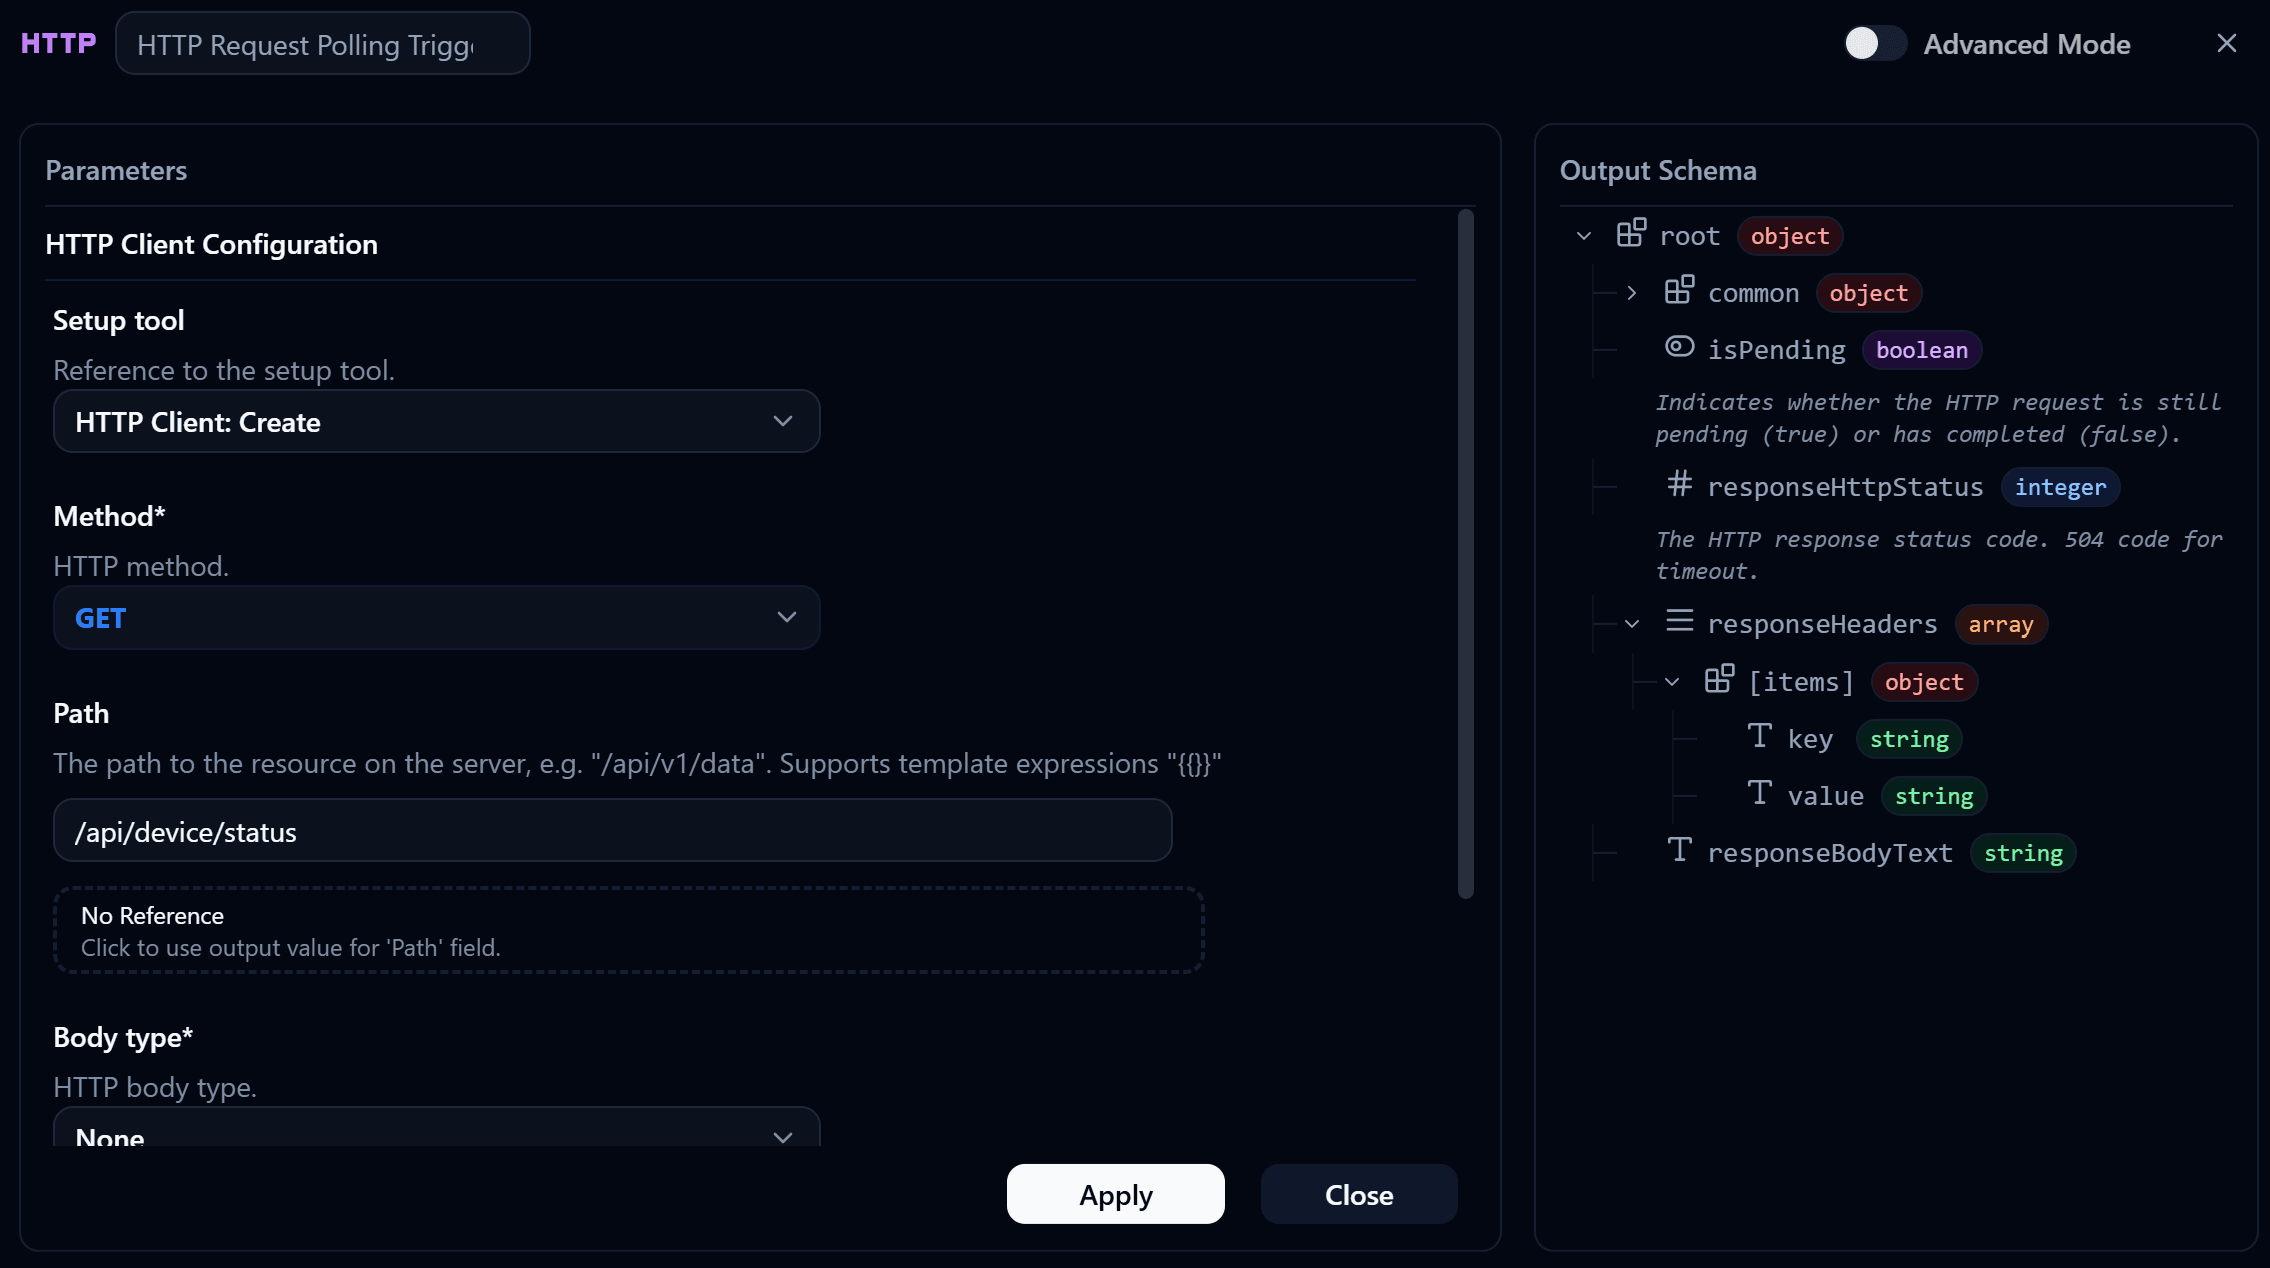
Key data this Node returns (Output Schema):
- isPending boolean:
true= waiting for a Response,false= Response received - responseHttpStatus integer: the status code, e.g. 200, 404, 504
- responseHeaders array: the Headers returned from the server
- responseBodyText string: the entire Response body as a string. This is what we will display
Node 3 · HTTP Client: Request
This Action Node sends one Request each time it is called. It works with the Polling Trigger, but the two have different roles. The Polling Trigger starts the Flow at each interval. HTTP Client: Request performs the request and passes the Response to downstream Nodes.
| Parameter | Value | Description |
|---|---|---|
| Setup Tool | HTTP Client: Create 1 | References the same Node as the Trigger |
| Method | GET | The method for retrieving data |
| Path | /api/devices/status | The same Path as the Trigger |
| Params | empty | Query parameters |
| Body type | None | No body |
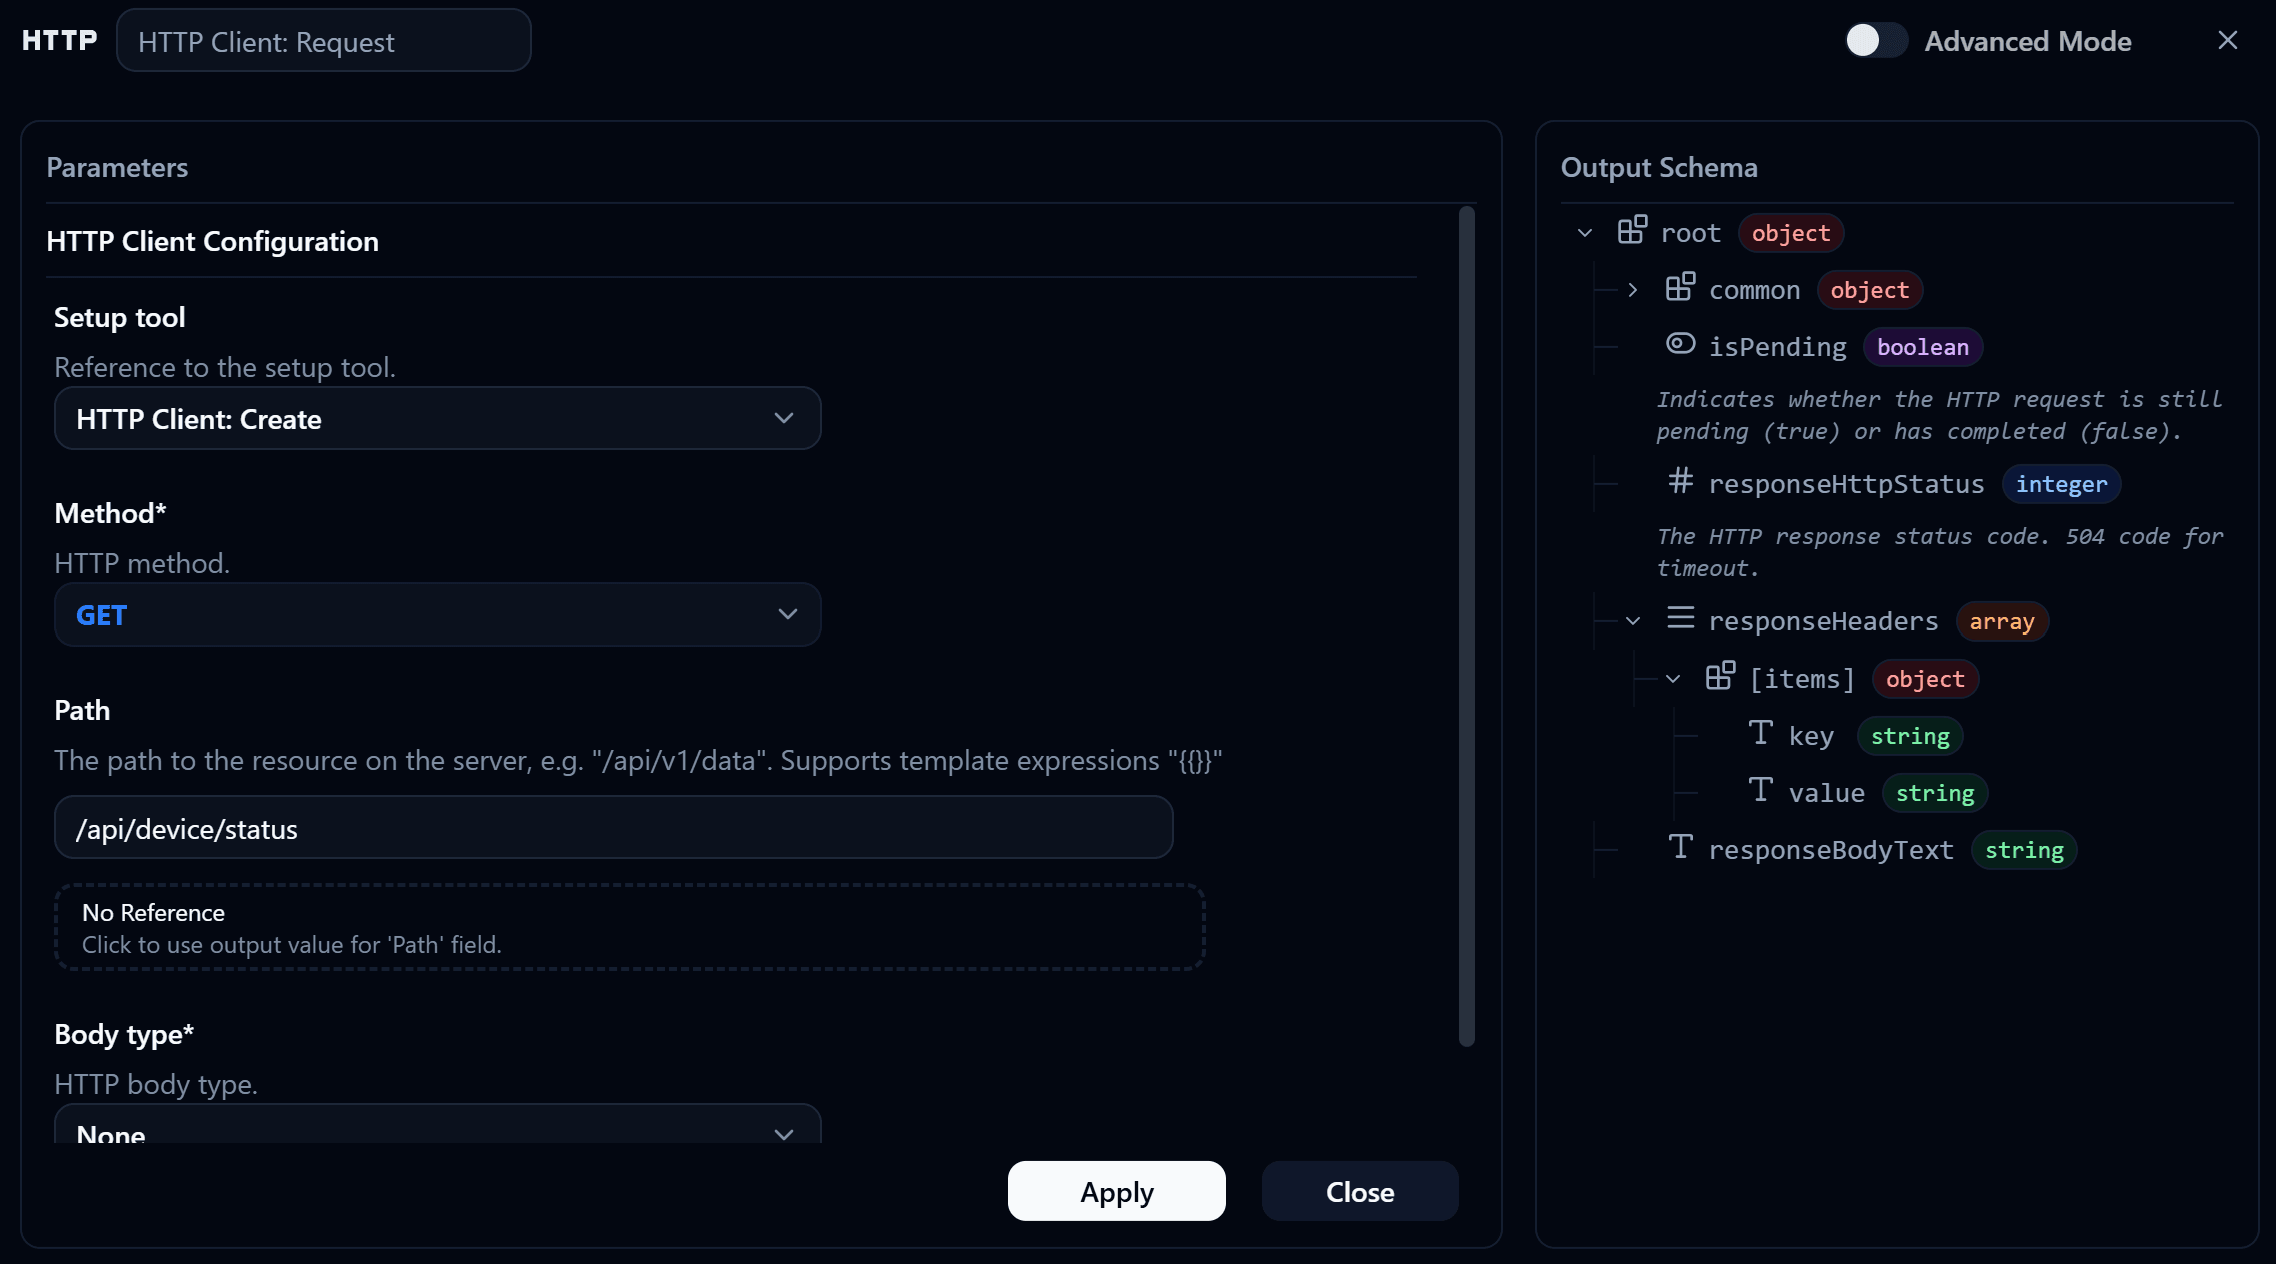
The Output is identical to the Polling Trigger in every respect, including responseBodyText, which we will use next in Variable: Modify.
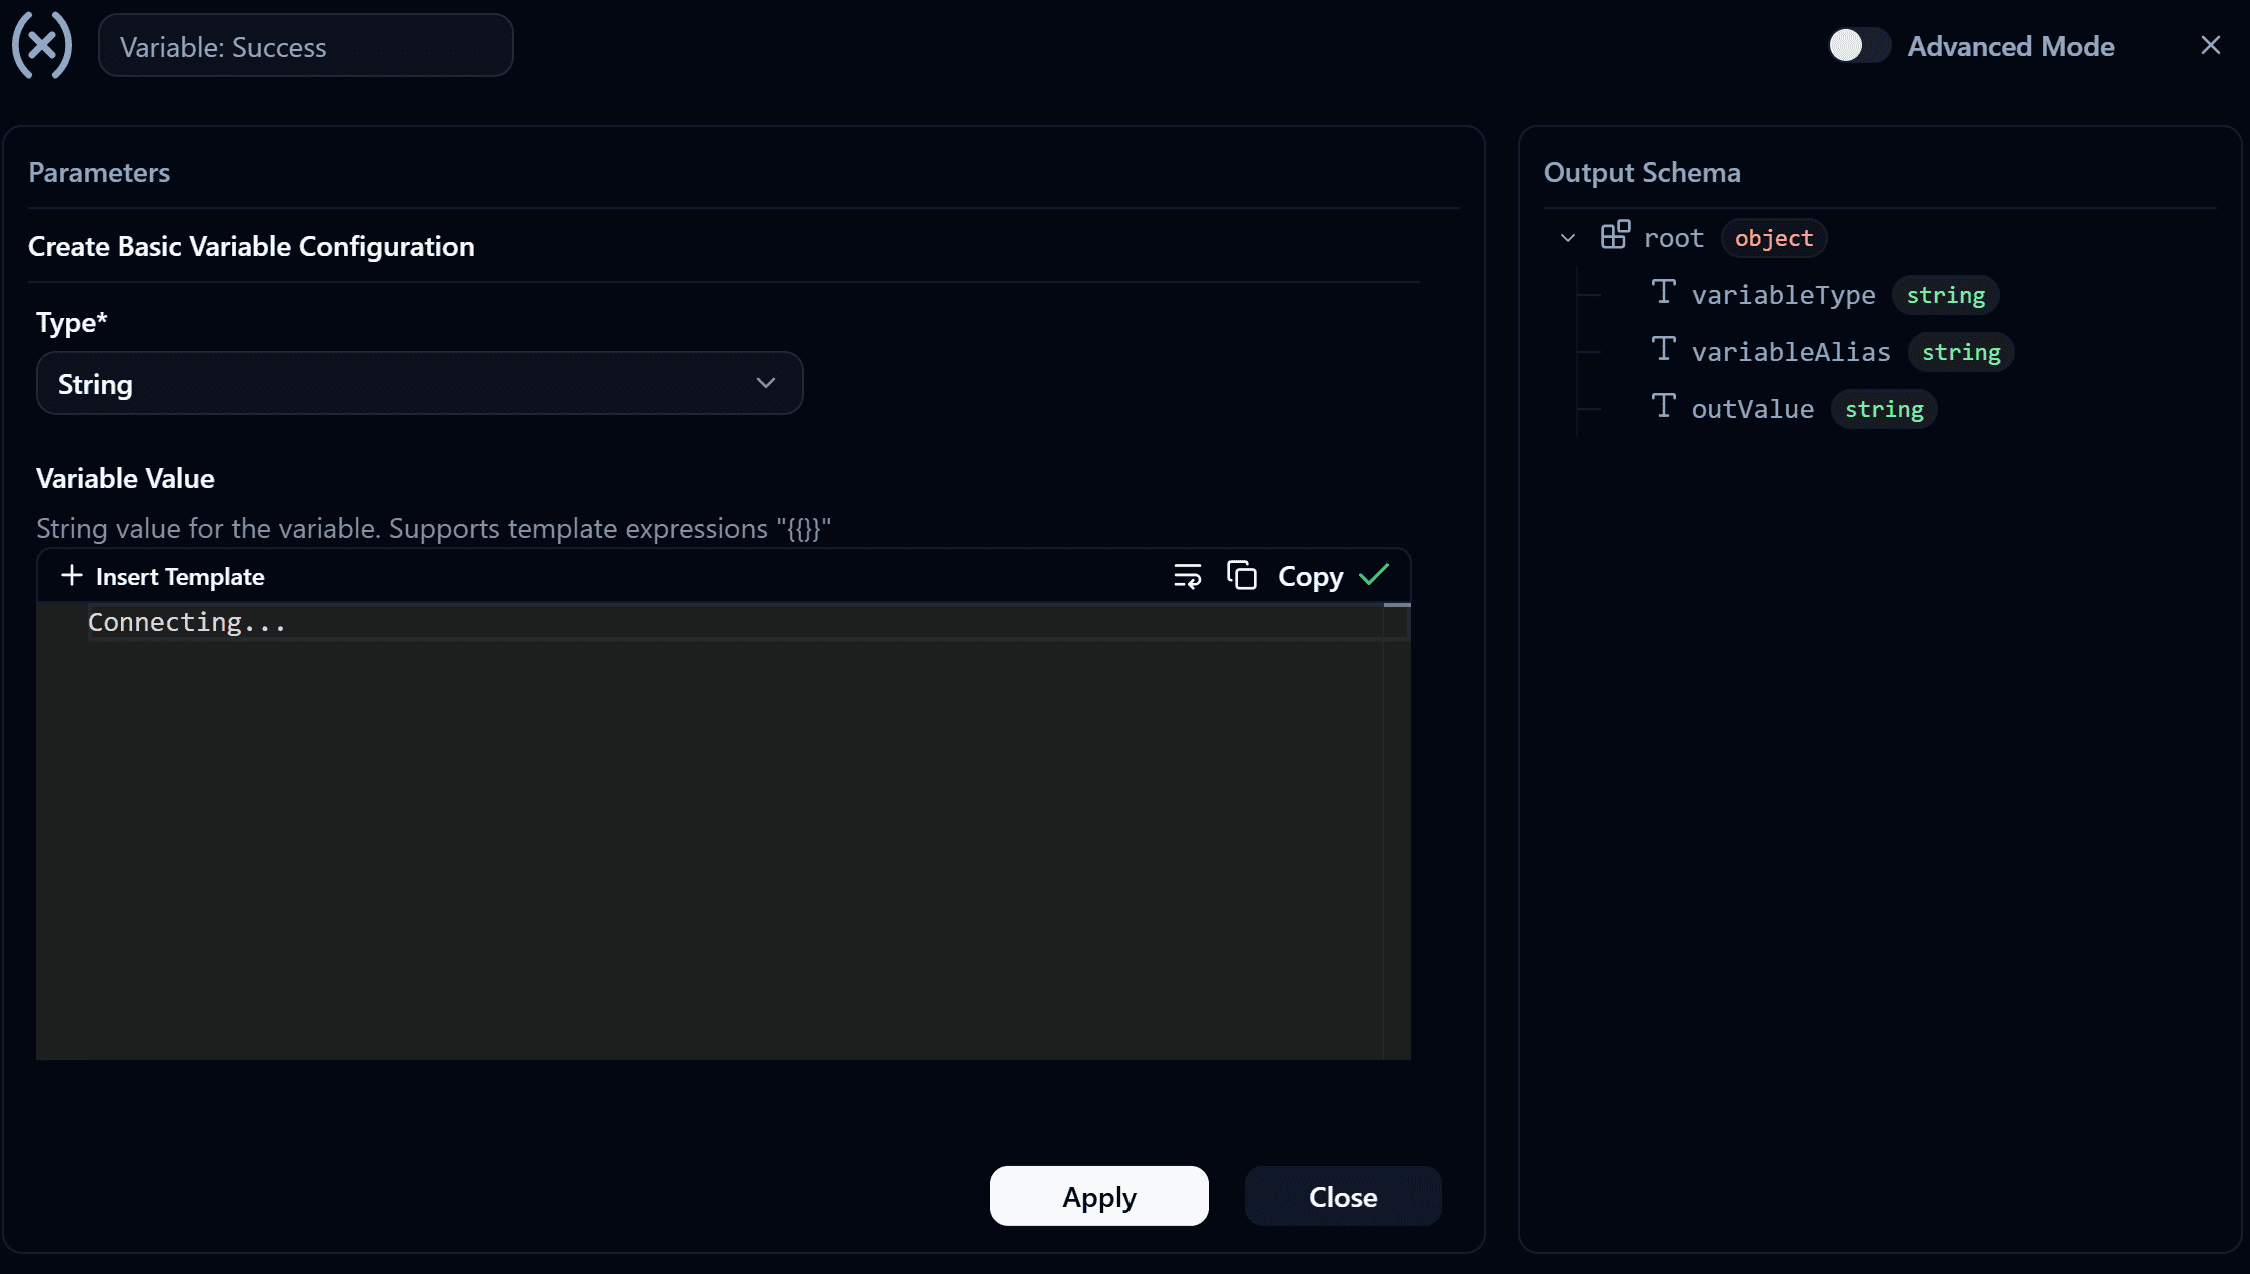
Node 4 · Variable: Create
Creates a variable to store the data from the HTTP Response. This variable will later be referenced by the Dashboard Widget for display.
| Parameter | Value | Description |
|---|---|---|
| Variable Name | Variable: Success | The variable name, for referencing elsewhere |
| Variable Value | Connecting..... | The initial value before real data arrives |
| Type | String | The data type (responseBodyText is a String) |
Note
This Node must be created before Variable: Modify, and only needs to be created once, so there is no need to recreate it on every Polling cycle.
Node 5 · Variable: Modify
Updates the variable's value with the new data from HTTP Client: Request every time the Polling Trigger fires.
| Parameter | Value | Description |
|---|---|---|
| Variable Source | Variable: Success | Select the variable created in Node 4 |
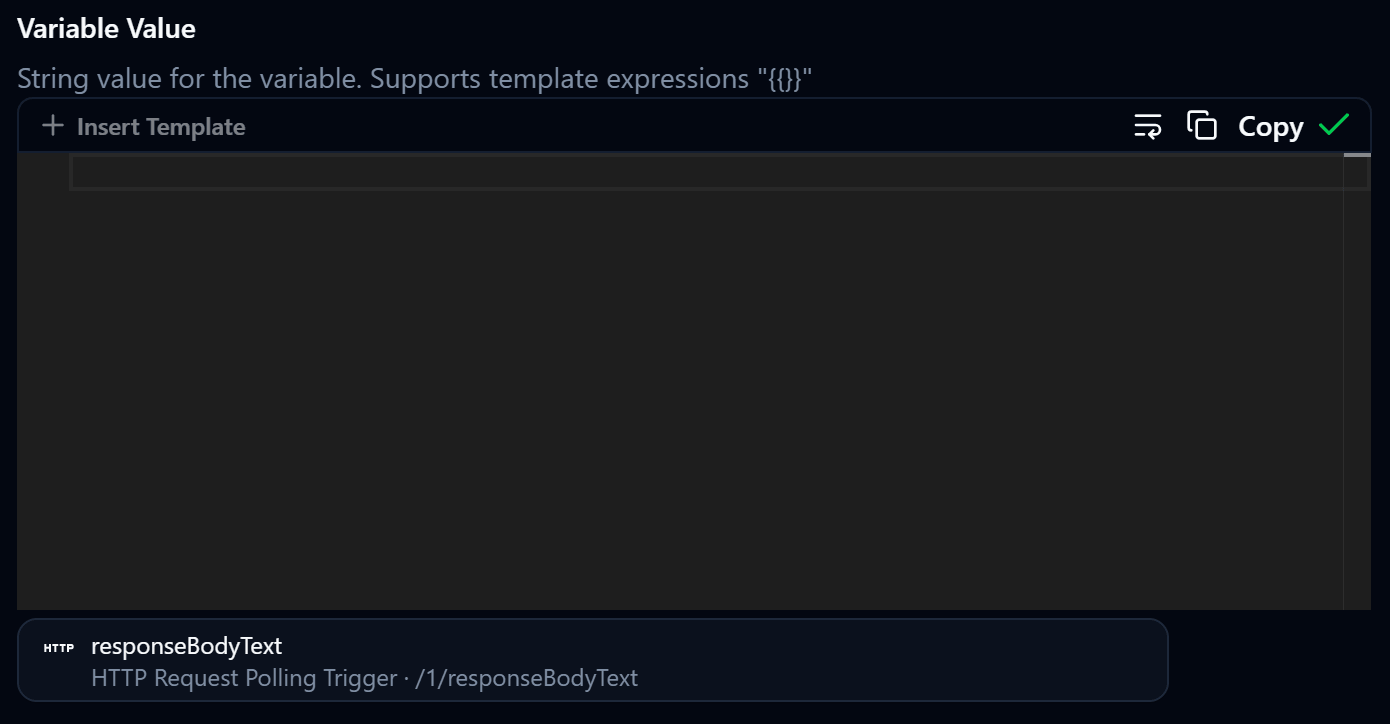
| Variable Value | responseBodyText from HTTP Client: Request 2 | The value pulled in to update on each cycle |
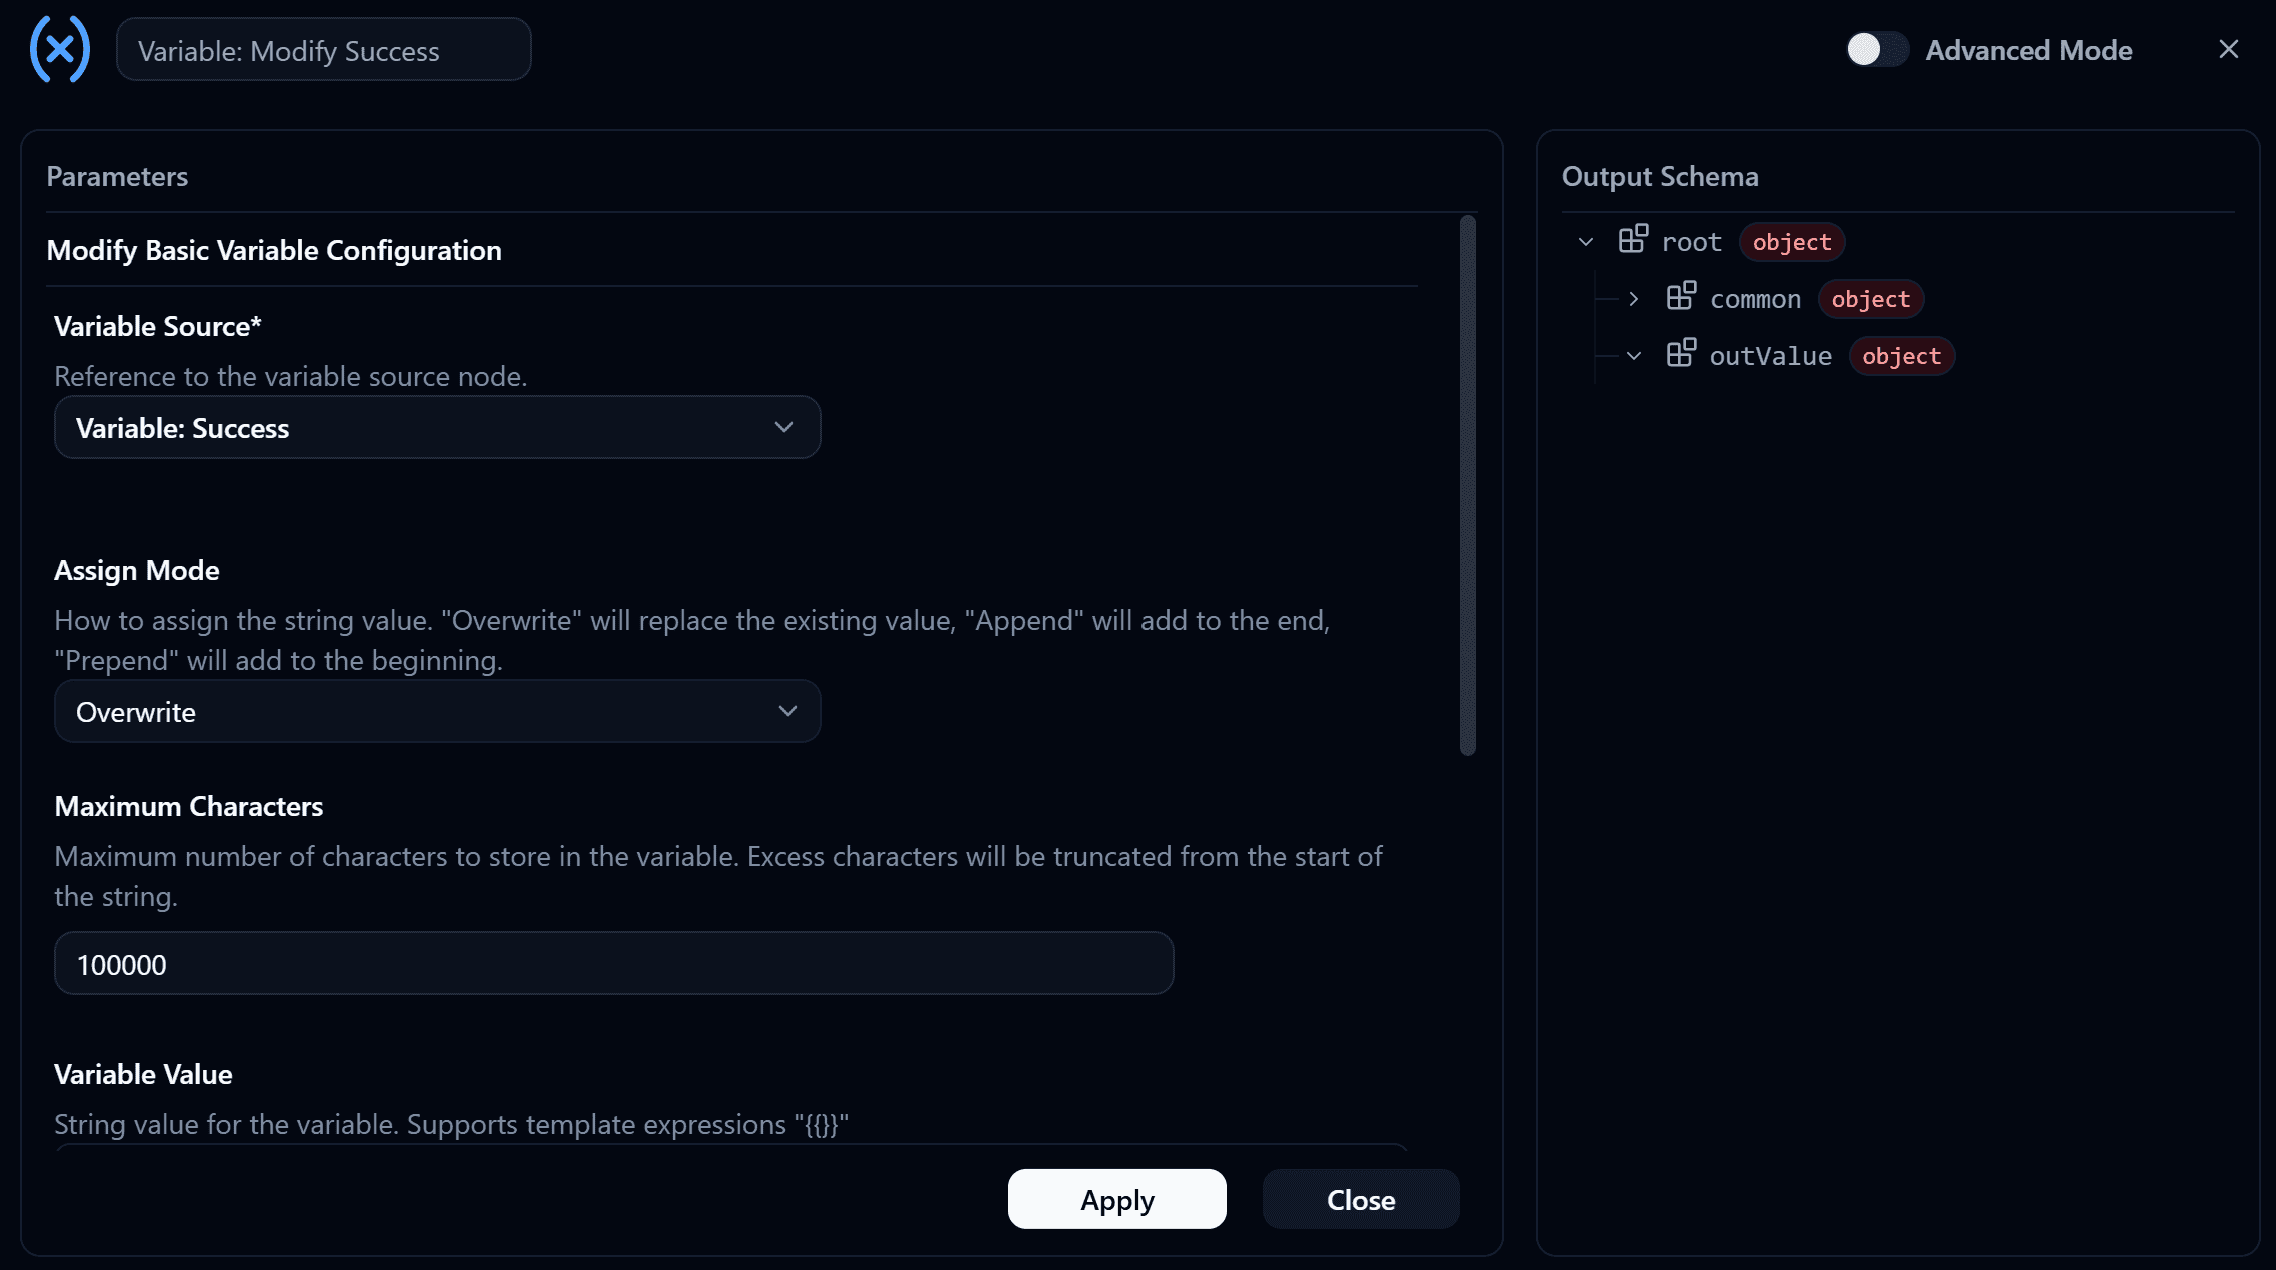
How to set the Variable Value:
- Click Insert Template in the Variable Value field
- Select HTTP Client: Request 2 from the list
- Select responseBodyText string
- Click Apply
5. Workshop · Connecting the Nodes
Once every Node is configured, wire them together on the Canvas in this order:
- HTTP Request Polling Trigger → HTTP Client: Request: the Trigger starts the Flow on each Polling cycle and passes control to the Request Node.
- HTTP Client: Request → Variable: Modify: the fetched Response is passed on so its value can be written into the variable.
Variable: Create and HTTP Client: Create are setup Nodes that are not wired into this main line. Variable: Create runs once to declare the variable, and HTTP Client: Create is referenced by the other Nodes through the Setup Tool field rather than connected with a wire.
The reason Variable: Create and Variable: Modify are separated is that Create declares the variable just once, while Modify overwrites it with a new value on every Polling cycle, which keeps the data on the Dashboard continuously updated.
6. Workshop · The Dashboard side
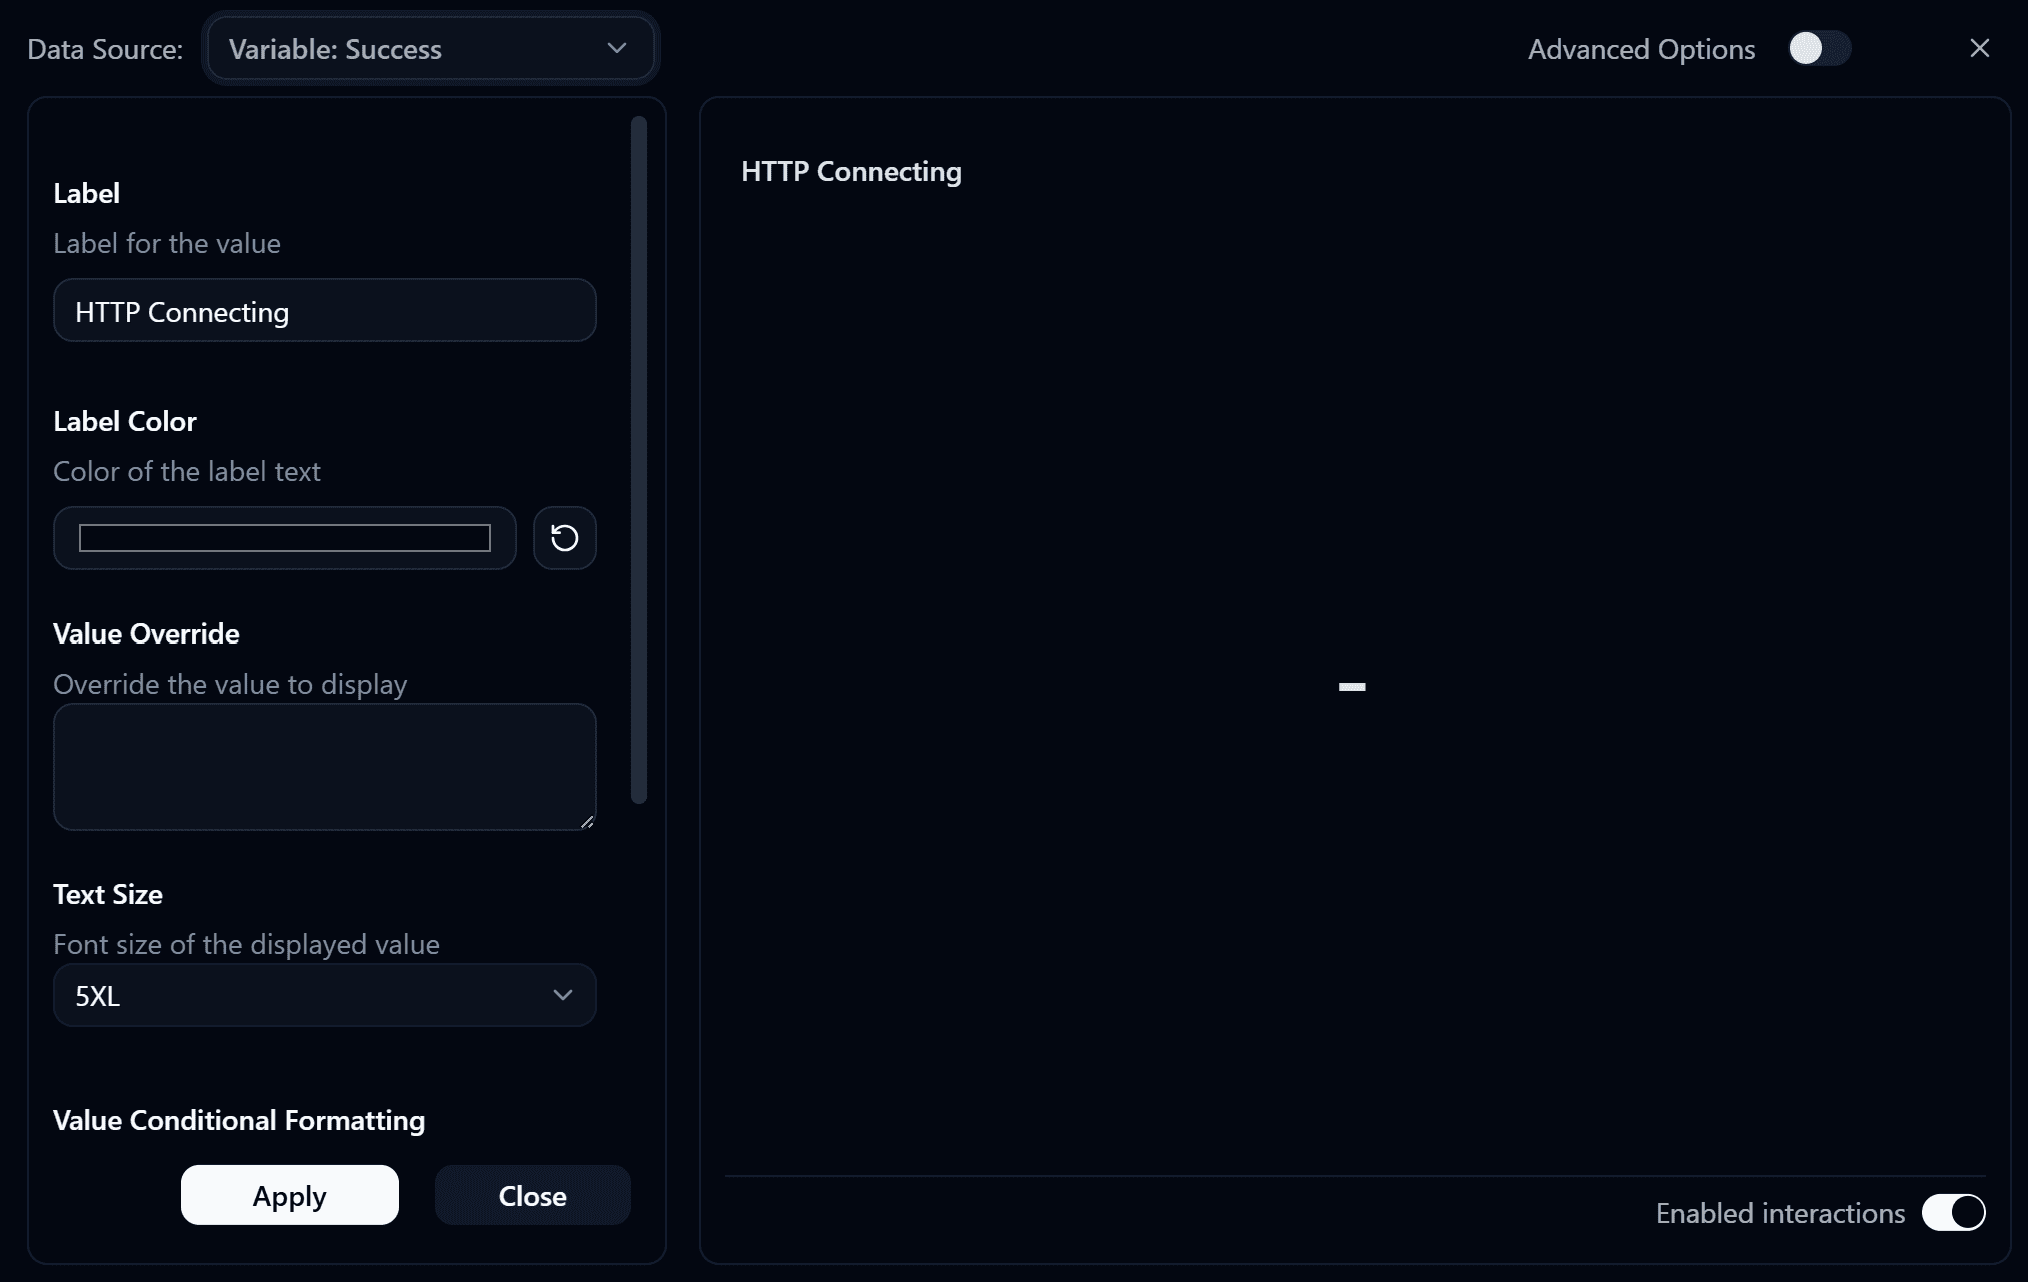
- Create a Basic Display Widget
- Set the Data Source to
Variable: Success - Go back to the Flow page and click Deploy
7. Trying it out
After deploying, while waiting for the first Polling cycle (based on the Interval, e.g. 1000 ms), the screen shows Connecting...... Once Polling succeeds, it pulls new data to display every 1 second, and the data shown matches what was set in Postman.
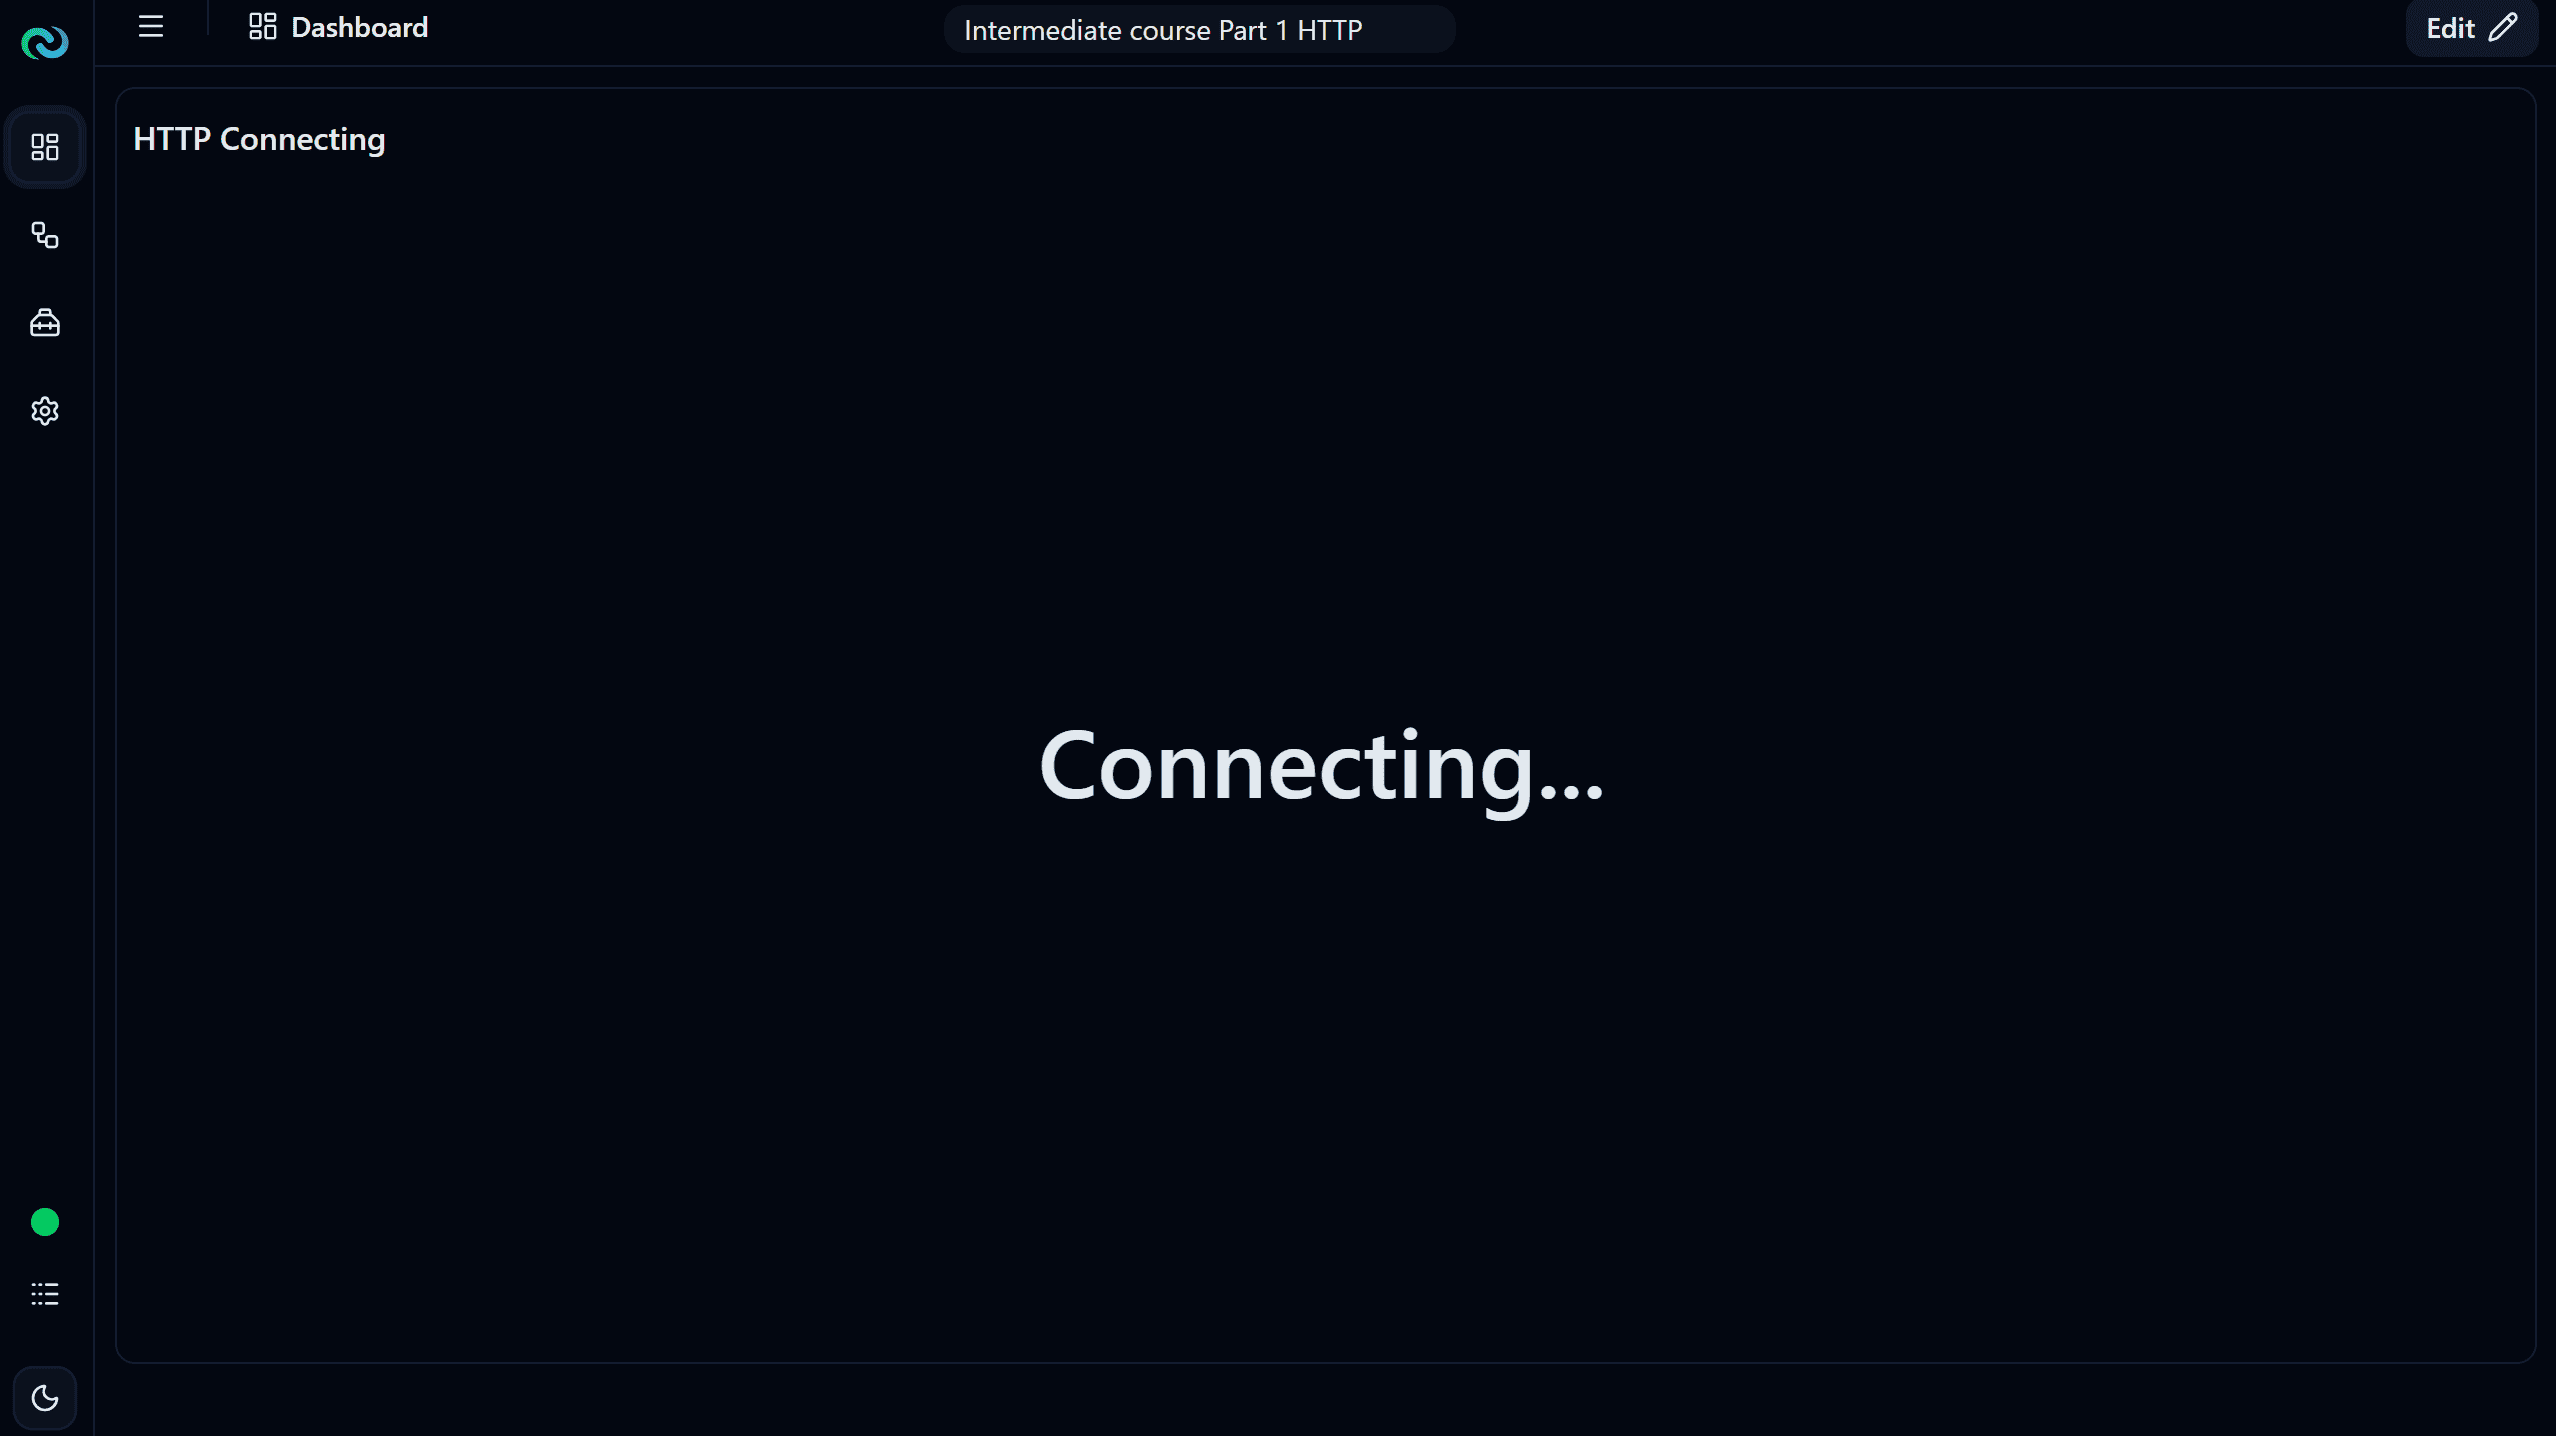
Try editing a value in the Mock Server too, such as changing temperature, and see whether the data on the Dashboard updates on the next Polling cycle. Or try changing the Status code to 404 to observe the behaviour when a Request is unsuccessful.
If the result isn't what you expected, work through these:
| Symptom | Likely cause |
|---|---|
Dashboard stuck at Connecting..... with no data | The Host in HTTP Client: Create has https:// in front, or Use HTTPS doesn't match the Mock Server link |
| A Response arrives but nothing shows on the Widget | Variable: Modify isn't referencing responseBodyText, or the Widget isn't pointed at Variable: Success |
| responseHttpStatus isn't 200 | The Path doesn't match the endpoint on the Mock Server, or the Postman Example's Status code isn't 200 |
| The data never updates | The Polling Interval is set too long, or the Nodes aren't wired in the right order |
8. Challenges
Challenge 1: Create another endpoint on the Mock Server, such as /api/devices/list, and configure it to return a list of devices. Then update the Flow to request data from this new endpoint and display the result in an additional Dashboard Widget.
Challenge 2 (POST): Create a POST endpoint on the Mock Server, such as /api/devices/command, that accepts data in a JSON body. Then update the Flow to send a request to this endpoint using the POST method. Set the Body type to JSON and use a sample payload such as:
{
  "deviceId": "DEV-001",
  "action": "restart"
}
After sending the request, check the Response returned by the Mock Server. This challenge introduces the process of sending data from a Client to a Server, which differs from the GET pattern used in the main workshop, where the Flow only requests data.
Once you understand this process, you can apply the same approach to real APIs and other external services. You only need to adjust the Host, Path, Method, and Authentication settings to match the target server.
Ready to go
That's the groundwork covered. Head to Mini Project 1 · Danger Zone Monitoring to build your first Flow, watching a danger area with video.
Part 1 · Email · Sending mail from a Flow
Get an App Password from Google, then configure Email Initialise and Email Send to send notification mail out of a Flow.
Mini Project 1 · Danger Zone Monitoring
Practice building a Flow that reads video, detects people with a pre-trained model, counts how many are standing inside a defined zone, and raises an alert when someone walks into the danger area.