
Switch Case · Creating multiple paths from one value
Use Switch Case to compare one value with up to four Cases, then build a Workshop that converts a machine mode number into a status message.
If-Then is suitable for a two-way decision. When a Flow has three or four possible paths, connecting several If-Then Nodes can make it difficult to read and maintain. Switch Case compares one value with several Cases and directs the Flow from a single Node.
1. How Switch Case works in general
Switch Case takes one value and checks it against each Case in order. The first Case that matches is the one the Flow leaves through. If none of them match, it goes out through Default.
2. How Switch Case works in NARA
In NARA, Switch Case supports up to four Cases. Each Case has its own output connection, along with a Default output for unmatched values.
                ┌─ matches Case 1 Value → Case 1
                ├─ matches Case 2 Value → Case 2
Switch Value → Switch Case
                ├─ matches Case 3 Value → Case 3
                ├─ matches Case 4 Value → Case 4
                └─ no match            → Default
You do not need to configure all four Cases. Empty Cases are ignored. If a value matches a configured Case whose output is not connected, that branch performs no further action.
3. Workshop · Machine status
In this Workshop, the user enters a numeric machine mode on the Dashboard. The Flow converts that number into a status message and displays the result on the Dashboard.
| Machine Mode | Status shown |
|---|---|
1 | Running |
2 | Stopped |
3 | Maintenance |
Wired up, the Flow looks like this:
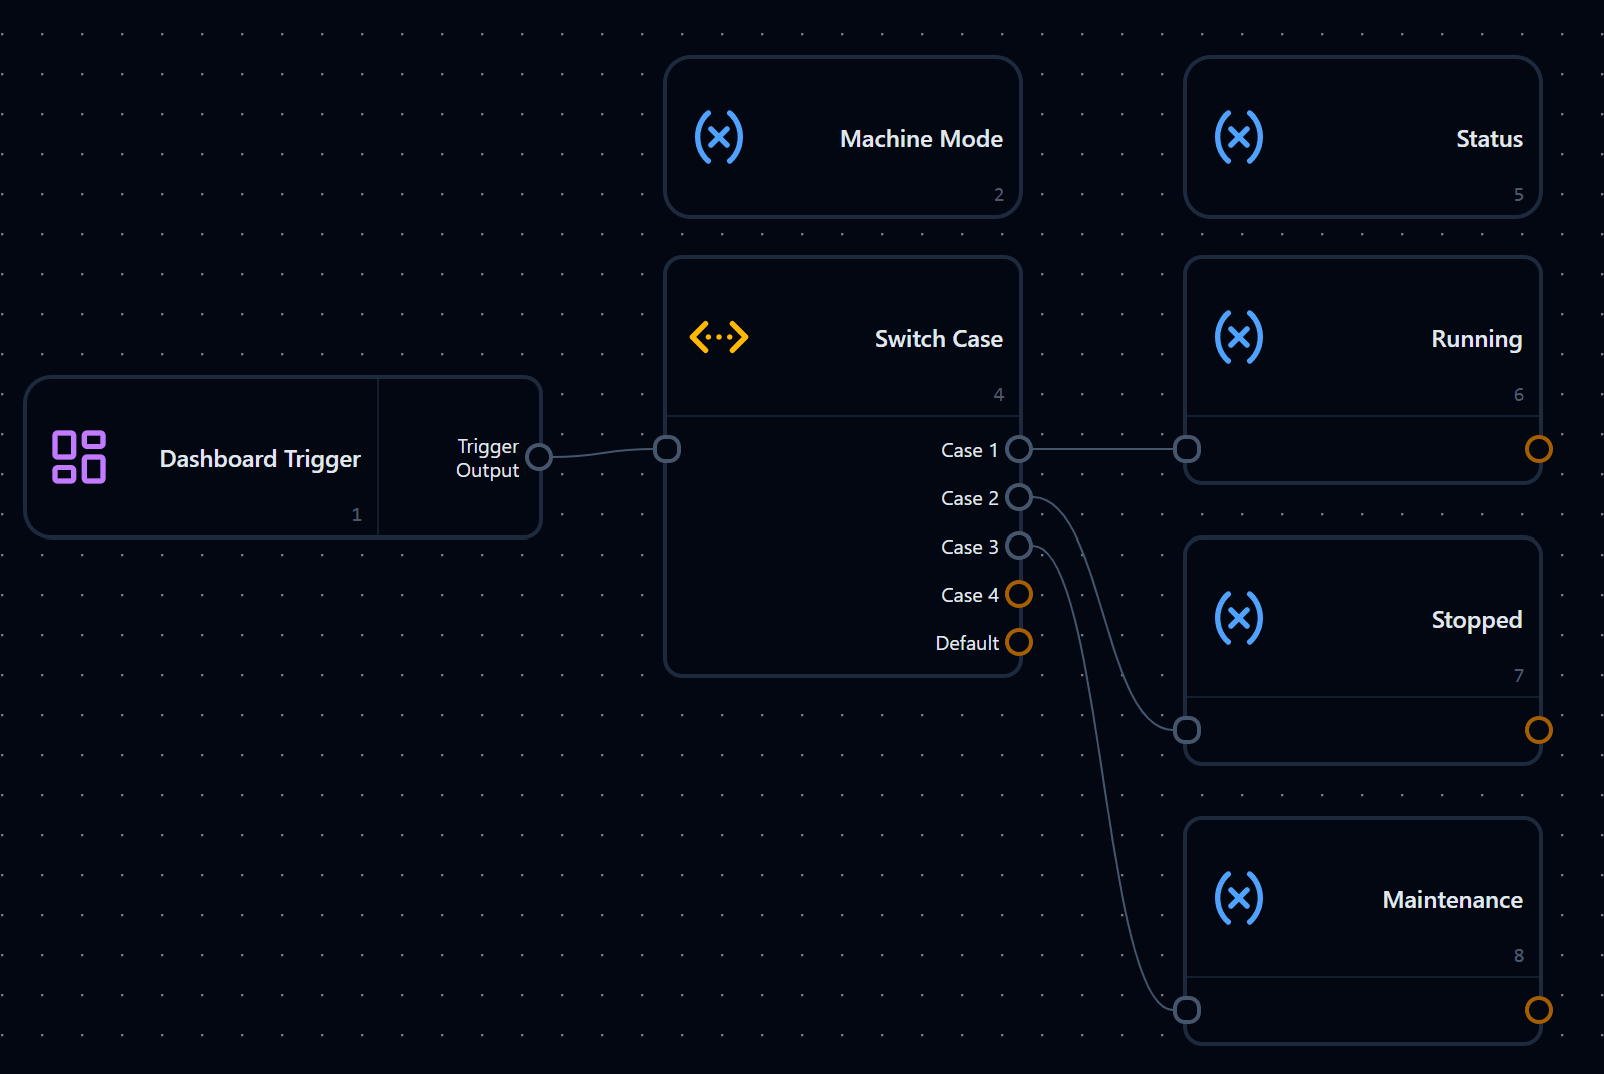
Drawn as a diagram, that's:
4. Workshop · The Dashboard side
The Dashboard uses three Widgets, all of them ones we've already used before.
| Widget | Purpose | Variable Source |
|---|---|---|
| Trigger Button | A Start button to run the Flow | — |
| Number Input | Takes the machine mode from the user | Machine Mode |
| Basic Display | Shows the translated status | Status |
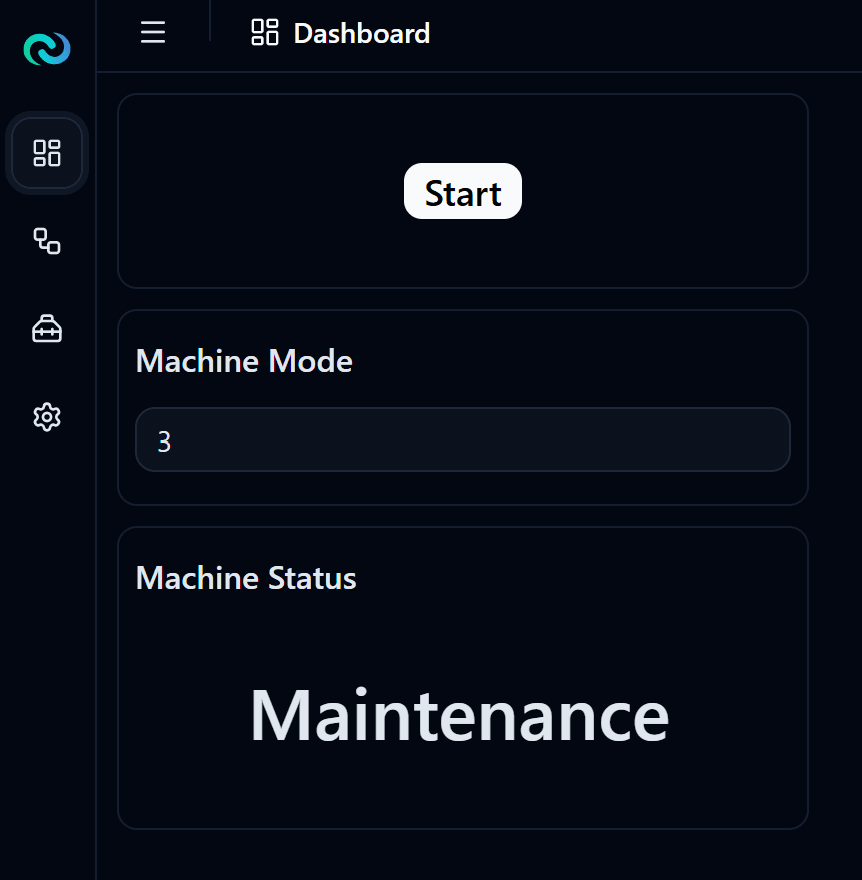
On the Flow side, create two Variable: Create Nodes to match those Widgets: Machine Mode of type number to receive the user's input, and Status of type string to hold the status text sent back for display.
To start the Flow, use a Dashboard Trigger bound to the Start button. The user types in a number, presses Start, and only then does the Flow run.
5. Workshop · Configuring Switch Case
Connect the Dashboard Trigger to the Switch Case Node and open its settings.
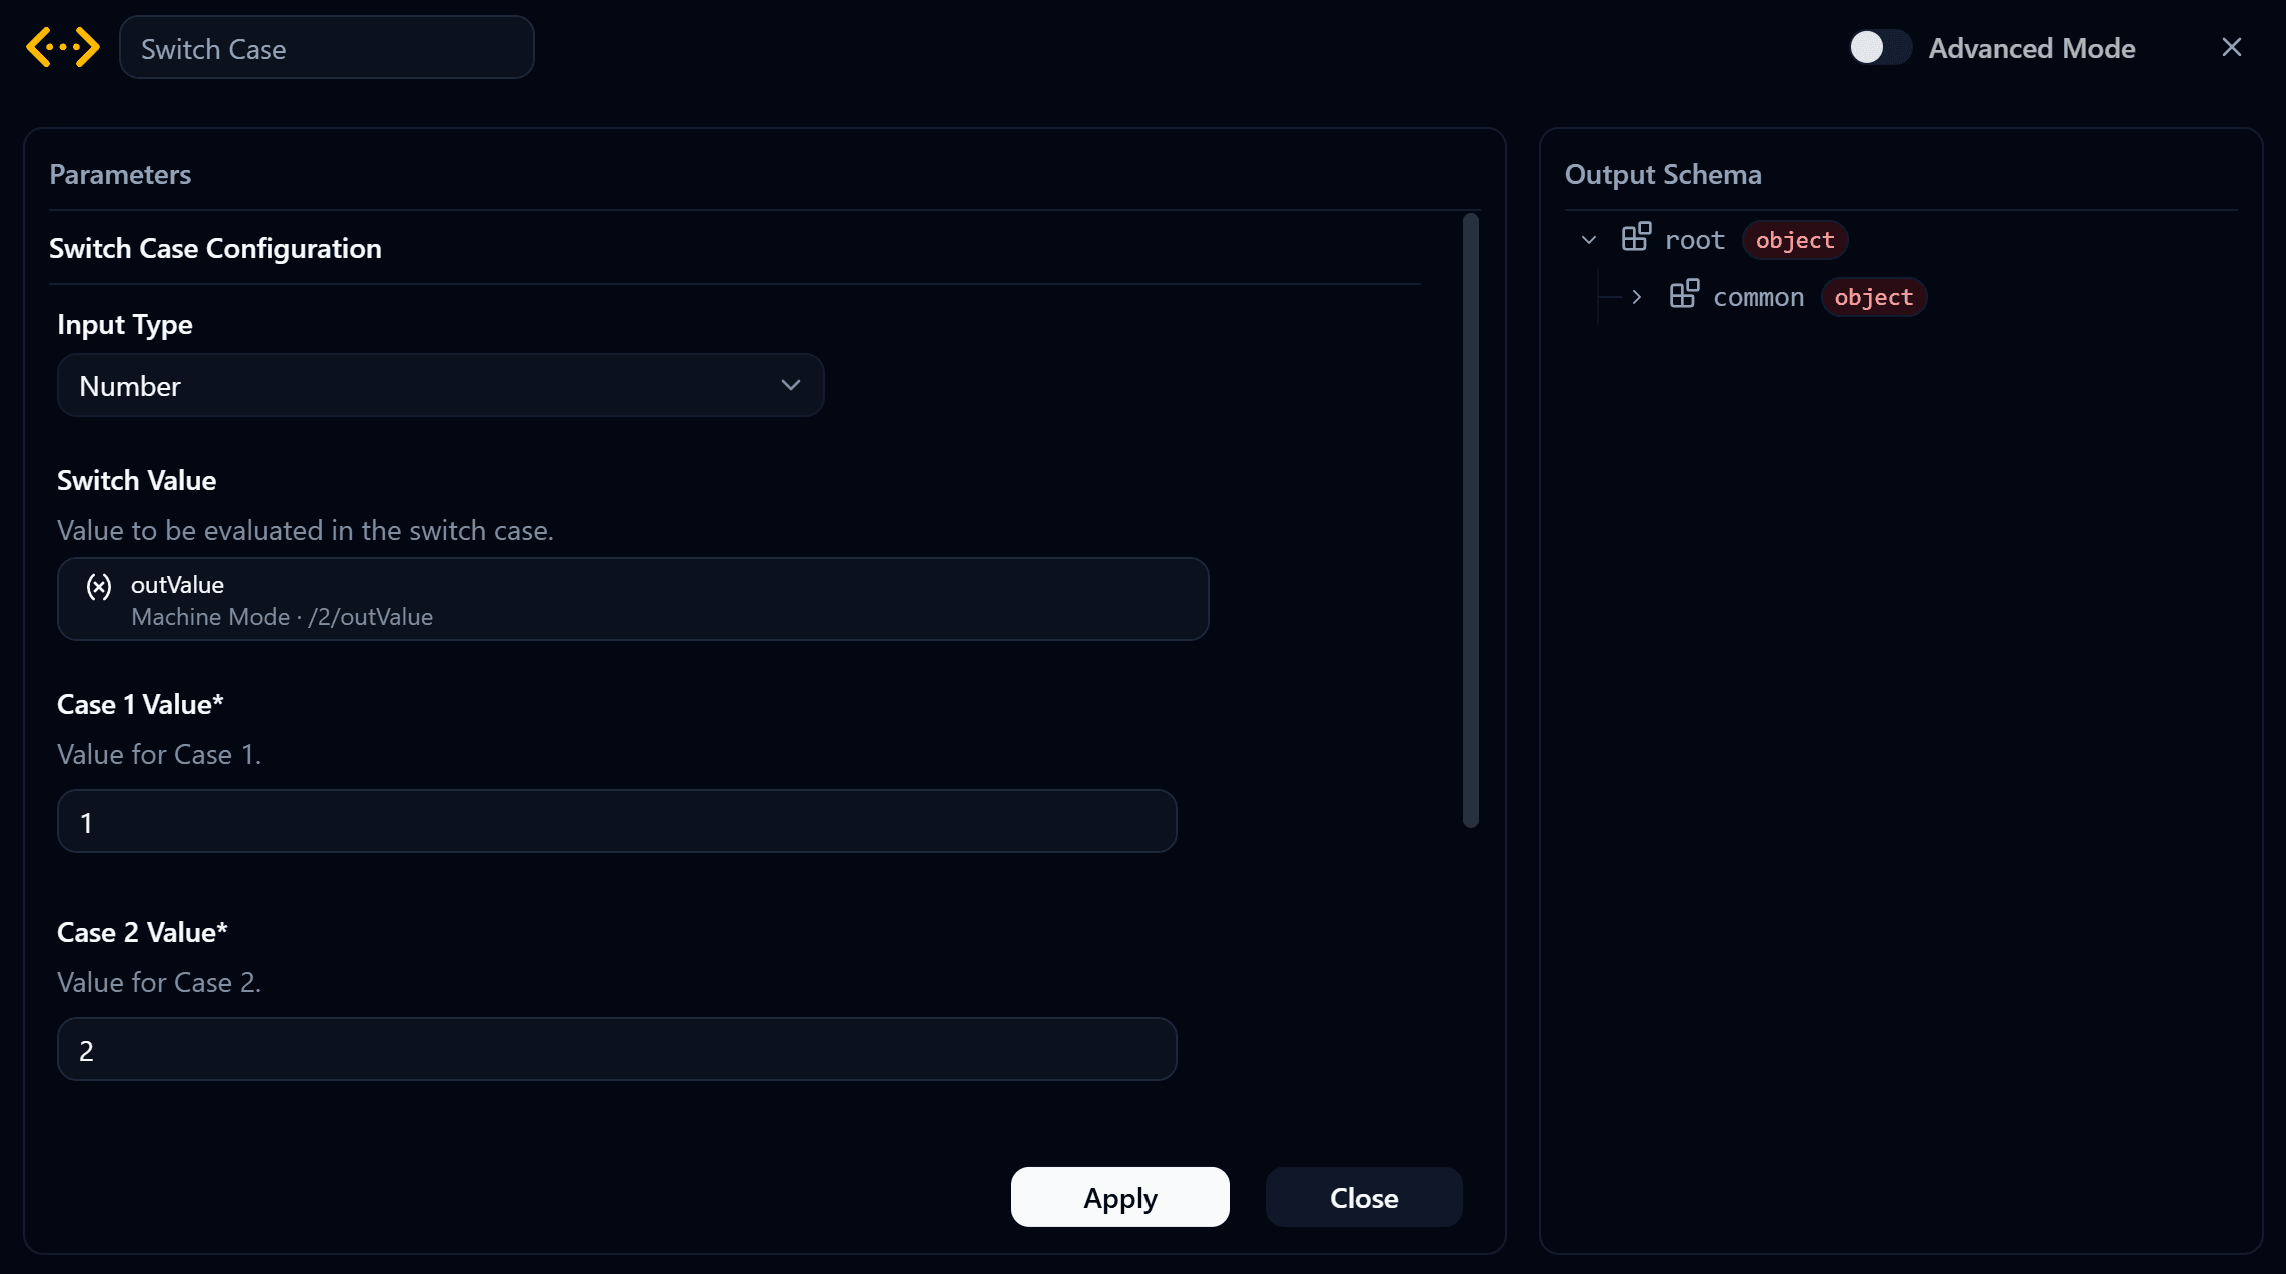
Configure the following settings:
- Input Type determines whether values are compared as
stringornumber. Select Number for this Workshop. - Switch Value is the value to compare. Use Reference to select the Output of
Machine Mode. - Case 1-4 Value defines the value for each Case. Enter
1,2, and3, then leave Case 4 empty.
Input Type has to match the real data
If Input Type does not match the data, none of the Cases may match and the Flow will use Default. In this Workshop, the displayed status will then remain unchanged because Default is not connected.
6. Workshop · Wiring up each Case
Each Case output goes to its own Node. Create three Variable: Modify Nodes named Running, Stopped, and Maintenance. All three reference Status as their Variable Source, and differ only in the text in the Variable Value field.
| From | Node name | Variable Value |
|---|---|---|
| Case 1 | Running | Running |
| Case 2 | Stopped | Stopped |
| Case 3 | Maintenance | Maintenance |
Here are the settings for the Running Node. The other two are the same, with only the text changed.
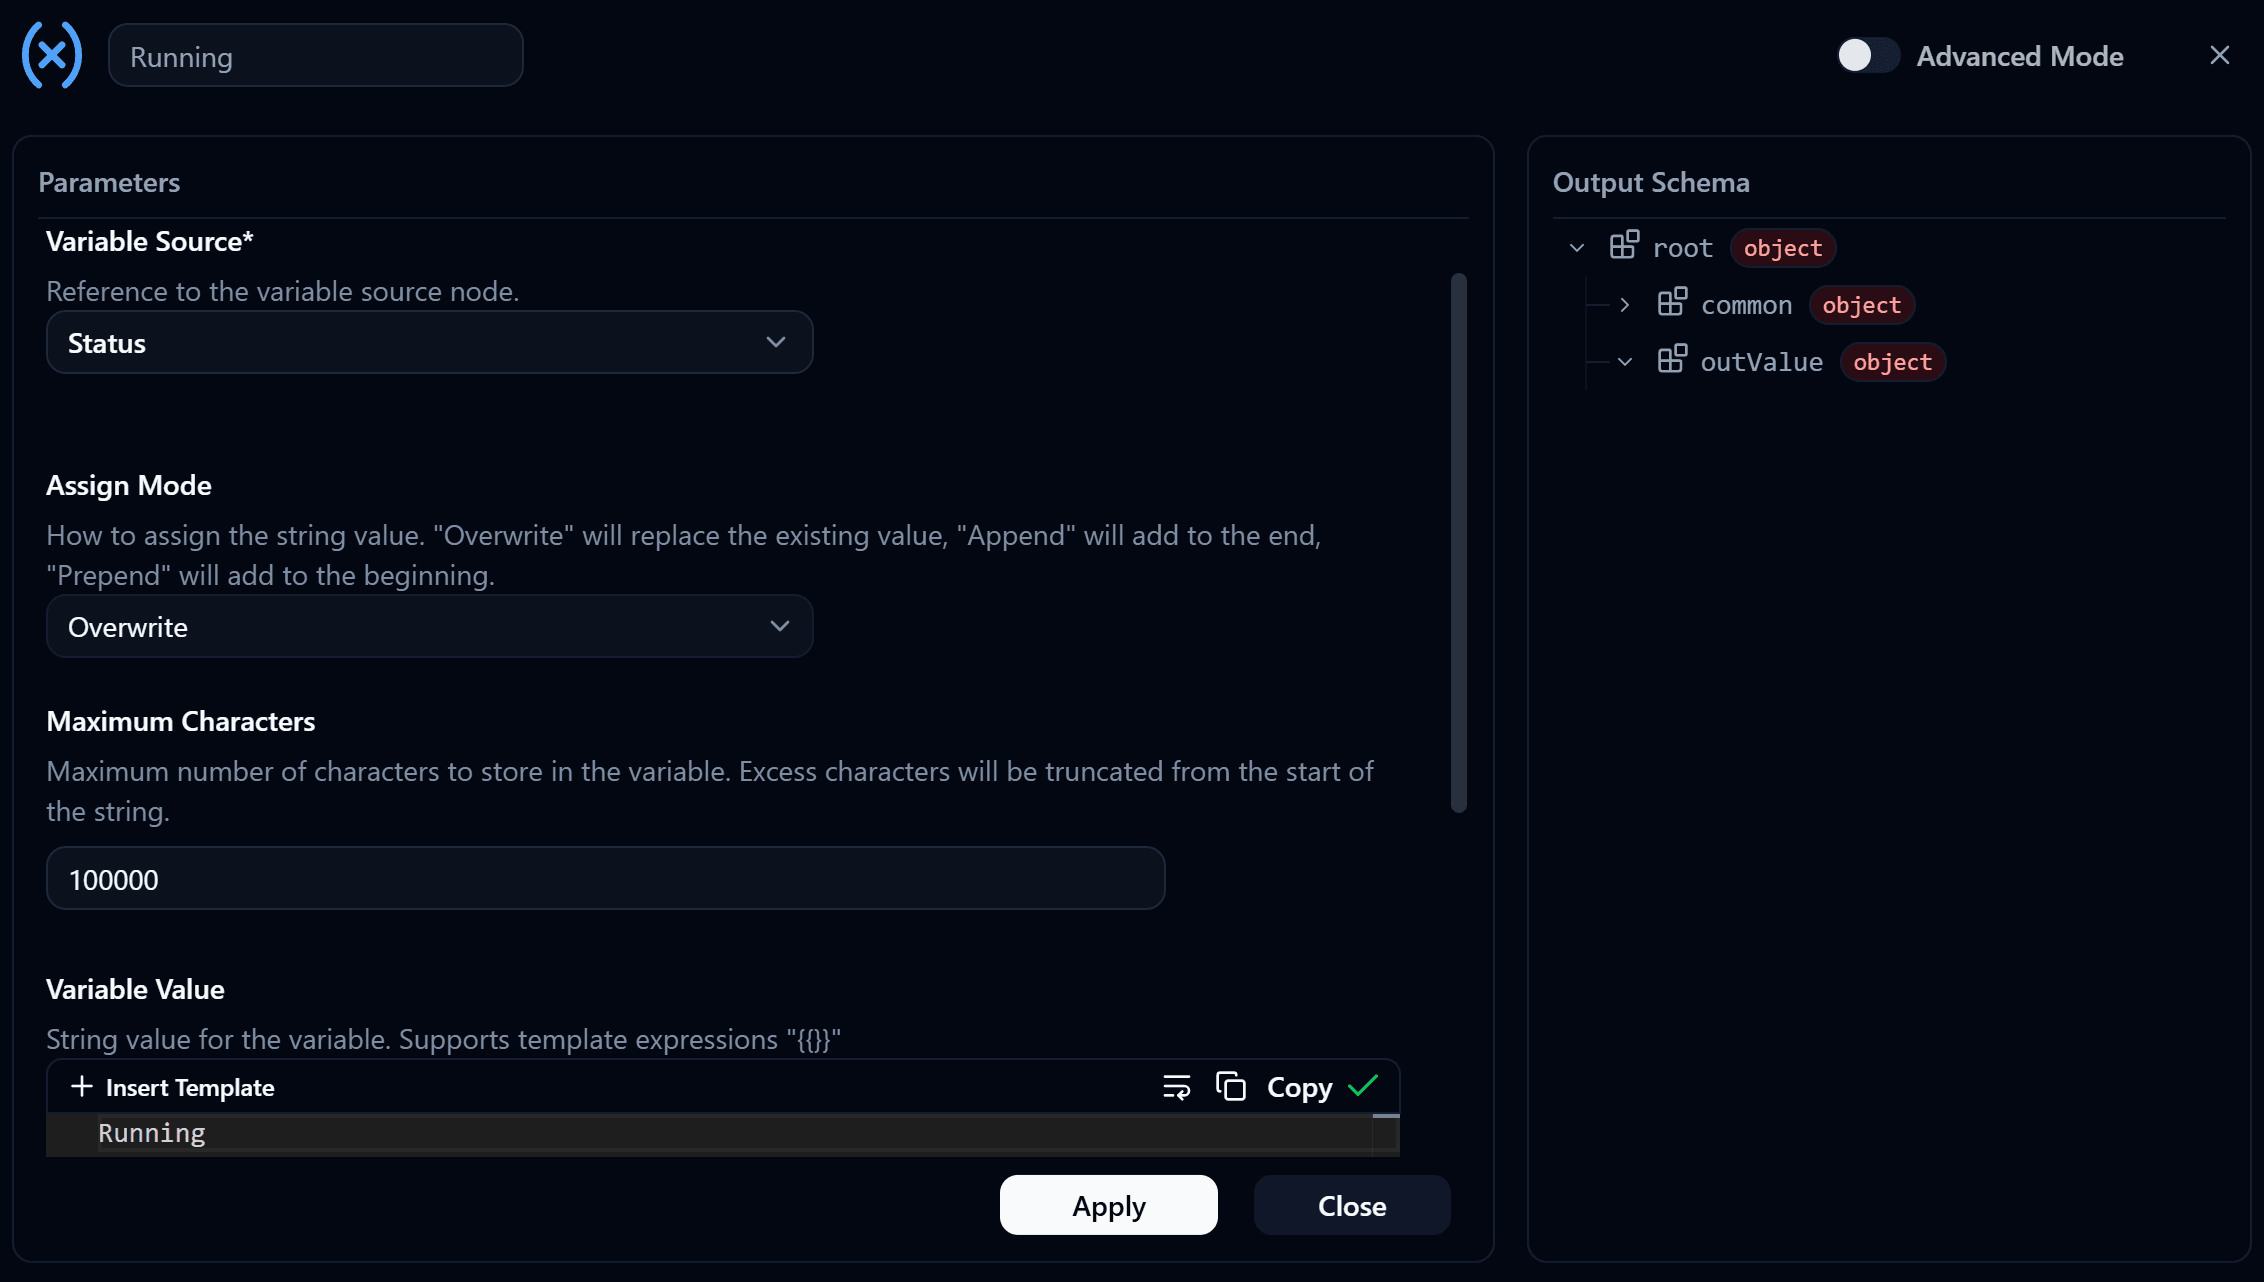
Leave the remaining settings at their defaults. Assign Mode should be Overwrite so that each run replaces the previous status. Append or Prepend would add new text to the existing value and could produce a result such as RunningStoppedRunning.
7. Trying it out
Deploy and try entering a number on the Dashboard. Enter 1 and press Start, and Machine Status reads Running. Enter 2 and it reads Stopped, 3 and it reads Maintenance.
Now try 4 or 0. The status stays at whatever it was, because nothing matches, so the Flow leaves through Default, which we haven't wired to anything. To handle that case too, connect one more Variable Modify to the Default output and have it write Unknown Mode.
If the result isn't what you expected, work through these:
| Symptom | Likely cause |
|---|---|
| No number changes the status | The Switch Case Input Type is string instead of number |
| Pressing Start does nothing | The Dashboard Trigger isn't bound to the Start button |
| Only some Cases change the status | That Case has no value set, or nothing is wired to its output |
| The text keeps getting longer | The Variable Modify Assign Mode isn't Overwrite |
| The display is empty | The Widget's Variable Source isn't set to Status |
Next
You have now completed the Operation chapter. Continue to Moving Number Calculation · Working from the latest values to learn how to process a sequence of numeric values.
If-Then · Creating conditional paths
Use If-Then to direct a Flow through Then, Else, or Skip, and build a Workshop that evaluates a Number Slider value from the Dashboard.
Moving Number Calculation
Use the Moving Number Calculation Node to work out a figure from the last few numbers that arrived, such as a moving average, a maximum, or a minimum, with a workshop that feeds values from a Slider and watches the average follow.